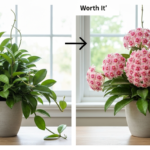
The problem is simple but frustrating: you want flowering plants indoors, but most need humidity levels your home doesn’t provide. You’ve probably noticed how African violets sulk, begonias lose their blooms, or orchids refuse to rebloom no matter what you try. Regular plant pots don’t trap moisture, and running a humidifier constantly isn’t practical or cheap.
Here’s where it gets interesting. That decorative apothecary jar sitting empty on your shelf could solve this problem completely. These glass containers create their own climate, turning dry indoor air into a humid environment where flowering plants actually thrive.
What you’re about to learn is how to transform these vintage jars into functioning miniature ecosystems. I’ll walk you through the difference between open and closed systems, which flowering plants work best in each setup, and how to layer soil so the roots stay healthy while the glass stays clear enough to actually see what’s happening inside.
I’ve spent years testing different flowering houseplants in various containers, and apothecary jars consistently produce better blooms than standard pots for humidity-loving species. The learning curve involves understanding condensation patterns, choosing between sealed and open setups, and getting the soil layers right so water doesn’t pool at the bottom. Once you grasp these basics, you’ll have a living display that combines vintage aesthetics with actual plant care benefits.
Understanding Apothecary Jar Systems
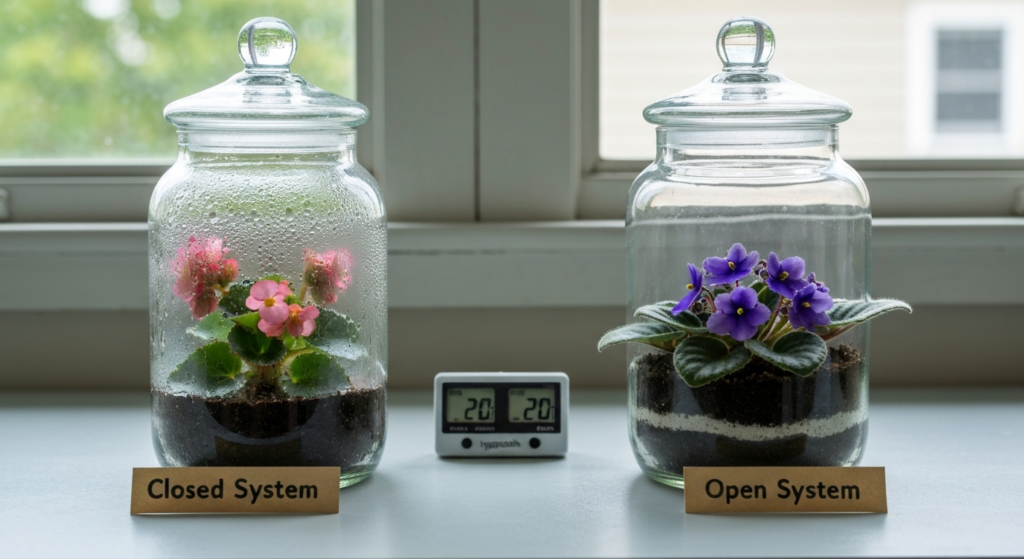
Apothecary jars come in two basic configurations for plant growing, and picking the wrong one for your flowering plant will cause problems fast.
A closed system means the jar has a lid that seals. Air circulation is minimal. Humidity stays trapped inside, often reaching 70-90%. This setup mimics tropical forest floors where many flowering plants evolved. The downside is condensation buildup, which can block your view and encourage fungal growth if you’re not careful.
An open system uses a jar without a lid or with the lid removed. Humidity stays higher than the surrounding room but doesn’t reach rainforest levels—usually around 50-60%. Air circulates freely, which prevents most mold issues but requires more frequent watering.
Most people assume closed is always better because it requires less maintenance. That’s only partially true. Closed systems work for plants that naturally grow in constantly moist environments, but many flowering houseplants need some air movement to prevent their blooms from rotting.
Here’s a comparison that matters:
| Feature | Closed System | Open System |
|---|---|---|
| Humidity Level | 70-90% | 50-60% |
| Watering Frequency | Every 2-4 weeks | Every 5-7 days |
| Condensation Issues | High (daily fogging common) | Minimal |
| Best For | Begonias, miniature orchids, ferns with flowers | African violets, small streptocarpus, episcias |
| Air Circulation | Nearly none | Moderate |
| Mold Risk | Higher without proper setup | Lower |
I started with closed systems because they seemed easier. The first jar I set up held a miniature rex begonia that bloomed constantly for three months. Then I noticed the glass stayed fogged every morning, and eventually white mold appeared on the soil surface. The plant survived, but I had to leave the lid off for a week to dry things out.
That experience taught me something important: closed systems need the right soil structure to handle all that trapped moisture.
Soil Layering for Clear Glass Viewing
The visible layers through glass are part of what makes apothecary jar terrariums appealing. But these layers aren’t just decorative—they serve specific drainage and root health functions.
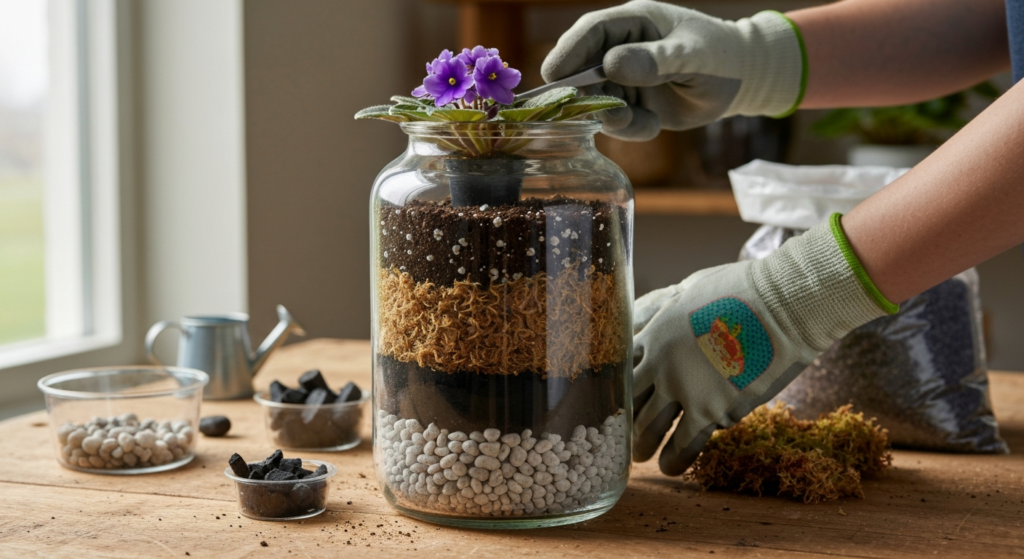
Bottom layer uses small rocks or pebbles. This creates a reservoir where excess water collects instead of saturating the soil constantly. Use about one inch for small jars (under 8 inches tall) or two inches for larger ones. The rocks need to be small enough that they settle evenly but large enough that water flows between them freely.
Next comes activated charcoal. This prevents the water reservoir from developing the swampy smell that happens when organic matter breaks down in standing water. A thin layer works—about half an inch is plenty. Some gardeners skip this, but every jar I’ve set up without charcoal eventually developed an odor.
The barrier layer stops soil from washing down into the rocks. Sphagnum moss works perfectly here. It lets water drain through while keeping the soil layer separate and visible. Just enough to cover the charcoal completely is all you need.
Finally, the soil layer itself. For flowering plants, regular potting mix usually works, but it needs modification. Mix in about 30% perlite or vermiculite to improve drainage. Flowering plants in enclosed jars often struggle with root rot if the soil stays waterlogged. The depth depends on your plant’s root system, but three to four inches handles most small flowering species.
Here’s what this looks like in practice:
| Layer | Material | Depth | Purpose |
|---|---|---|---|
| Base | Small pebbles or aquarium gravel | 1-2 inches | Water reservoir, prevents root sitting in water |
| Filter | Activated charcoal | 0.5 inches | Controls odor, keeps water fresh |
| Barrier | Sphagnum moss | Thin coverage | Separates soil from drainage layers |
| Growing Medium | Potting mix + 30% perlite | 3-4 inches | Root support, moisture retention with drainage |
When I set up my first few jars, I used whatever rocks I found outside. Big mistake. They were too large and irregular, creating gaps where soil washed through. The layers mixed together within a month, and the whole visual effect disappeared. Using uniform small pebbles or aquarium gravel solved that problem completely.
The other lesson came from skipping the moss barrier. Without it, every time I watered, soil particles filtered down into the charcoal layer. After about six weeks, the clean separation between layers turned muddy looking. Adding that thin moss layer keeps everything distinct and visible.
Humidity-Loving Flowering Plants That Actually Work
Not every flowering plant tolerates the high humidity and limited root space that apothecary jars provide. Some species thrive while others decline quickly.
African violets are the most reliable option for open or partially open jars. They prefer 50-60% humidity, which is what you get when the lid stays off. The compact root systems fit easily in small spaces, and they bloom almost continuously under the right light. The flowers are sensitive to water droplets, though, so condensation on the glass shouldn’t drip directly onto the blooms.
Miniature begonias, especially rex varieties with flowers, do extremely well in closed systems. The high humidity keeps their leaves vibrant and encourages flowering. These plants naturally grow in humid forest understories, so the trapped moisture matches their native environment. Watch for powdery mildew on the flowers if air circulation drops too low.
Episcias are underused but perfect for this setup. They produce small tubular flowers in red, orange, or pink and spread slowly across the soil surface. The humidity prevents the leaf edges from browning, which happens constantly when these plants sit in dry room air. They work in both open and closed jars.
Small orchids need careful selection. Miniature phalaenopsis varieties can work in larger apothecary jars with partial openings, but they need more air movement than most closed systems provide. Jewel orchids, which bloom occasionally but are grown mainly for foliage, adapt better to fully closed environments.
Streptocarpus (Cape primrose) varieties bred for compact growth fit nicely in medium-sized jars. They need moderate humidity and good air circulation, making them better suited to open systems or jars with the lid propped slightly open.
Here’s what works in each setup:
| Plant Type | Best System | Humidity Needs | Bloom Frequency | Light Requirements |
|---|---|---|---|---|
| African Violet | Open or partial | 50-60% | Continuous with proper light | Bright indirect |
| Miniature Rex Begonia | Closed | 70-80% | Moderate, seasonal | Medium to bright indirect |
| Episcia | Both | 60-70% | Periodic year-round | Medium indirect |
| Miniature Orchids | Partial or open | 50-70% | Varies by species | Bright indirect to some direct morning sun |
| Streptocarpus | Open | 50-60% | Frequent in growing season | Bright indirect |
I tested a miniature phalaenopsis in a completely sealed jar once. It looked healthy for about two months, then the newest flower buds turned brown and dropped before opening. The problem was stagnant air—orchid flowers need gentle movement to develop properly. Cracking the lid open about half an inch solved the issue, and the next bloom cycle produced perfect flowers.
The same jar with a rex begonia stayed completely sealed and flowered without problems. Different plants need different systems, and matching them correctly makes the difference between success and frustration.
Managing Condensation Without Losing Humidity
Condensation is the main visual problem with closed apothecary jar terrariums. It’s also a signal about what’s happening inside the jar.
Heavy condensation that fogs the entire glass surface means there’s too much water in the system. The air inside is saturated, and excess moisture is condensing on the cooler glass. Light condensation appearing overnight and clearing by afternoon is normal and healthy. It shows the system is maintaining humidity without being oversaturated.
Temperature changes drive condensation patterns. When room temperature drops at night, the glass cools faster than the air inside the jar. Moisture condenses on the glass. As the room warms in the morning, the glass warms too, and the condensation evaporates back into the air.
To control this, adjust the lid position. If the glass stays fogged all day, remove the lid completely for a few hours. This lets excess moisture escape. Then replace the lid but leave a small gap—propping it slightly open with a small stone or folded paper works. Check the condensation pattern for a few days and adjust the gap size until you get light overnight fogging that clears by midday.
Wiping the inside glass only helps temporarily. The moisture is still in the system and will condense again. The real fix involves removing water from the environment by allowing air exchange.
Here’s how to troubleshoot condensation problems:
- Constant heavy fogging: Remove lid for 12-24 hours, reduce watering frequency
- No condensation at all: Soil may be too dry, increase watering or seal lid more completely
- Condensation only on one side: Uneven temperature (one side near window or heat source), rotate jar location
- Water droplets falling on plants: Too much moisture, open lid partially for several days
- Glass clears within 1-2 hours of sunrise: Perfect balance, no adjustment needed
I placed one jar near a window where afternoon sun hit it directly. The glass stayed completely clear on that side because the heat evaporated moisture faster than it could condense. The shaded side of the same jar showed normal condensation patterns. Moving the jar three feet away from direct sun evened everything out.
The other common mistake is adding too much water at once. When I started, I poured water until I saw it pooling in the pebble layer. That created excessive humidity and constant fogging. Now I water slowly and stop when the soil feels evenly moist but not saturated. The difference in condensation levels is significant.
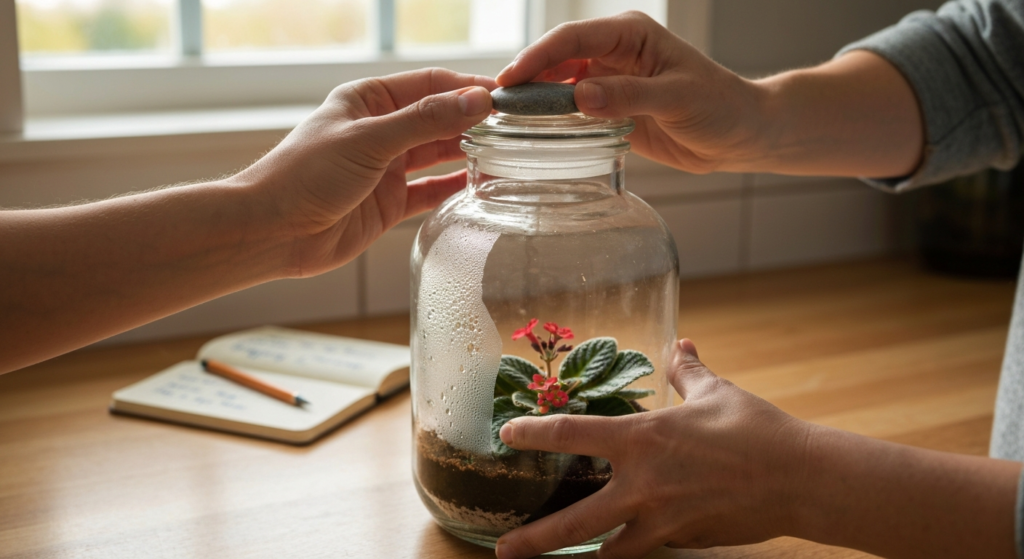
Setting Up Your First Flowering Terrarium
Starting with the right jar size prevents most frustration. Small jars under six inches tall work for single African violets or small episcias. Medium jars between eight and twelve inches accommodate miniature begonias or small streptocarpus. Larger jars over twelve inches can hold small orchids or multiple plants in combination.
Clean the jar thoroughly before adding anything. Soap residue or oils from handling can create cloudy spots on the glass that won’t clear. Rinse several times with plain water after washing.
Add layers in order: pebbles, charcoal, moss, soil. Tamp each layer gently to settle it but don’t compress so hard that drainage gets blocked. The layers should look distinct and relatively level.
Plant selection matters more than most people think. Choose plants that are already healthy and actively growing. Stressed plants rarely recover in the transition to terrarium life. If you’re using a blooming plant, pick one with several unopened buds rather than one in full bloom—the new flowers will develop adapted to the jar environment.
Make a small hole in the soil layer for the plant roots. Remove the plant from its nursery pot and gently shake off excess soil. You want the roots mostly bare so they make direct contact with the terrarium soil. Position the plant so it sits at the same depth it was growing before.
Water lightly around the root zone. For closed systems, use less water than feels right—maybe half what you’d use for the same plant in a regular pot. The moisture doesn’t escape, so a little goes far. For open systems, water until the soil feels evenly moist throughout.
Place the jar in appropriate light. Most flowering plants need bright indirect light to bloom. Near an east-facing window works well. Too much direct sun overheats the jar and causes stress. Too little light results in healthy foliage but no flowers.
Monitor daily for the first week. Check condensation patterns, look for signs of stress in the plant, and make sure the soil moisture stays consistent. This is when you’ll learn how your specific jar, plant, and location interact.
Here’s a quick setup checklist:
| Step | Action | Common Mistake to Avoid |
|---|---|---|
| Choose jar | Match size to plant root system | Picking jars too small for plant growth |
| Clean glass | Wash with soap, rinse thoroughly | Leaving soap residue that clouds glass |
| Layer materials | Add in order: rocks, charcoal, moss, soil | Skipping charcoal or moss barrier |
| Plant selection | Use healthy, actively growing specimens | Choosing stressed or damaged plants |
| Watering | Start with less than expected | Overwatering initially |
| Positioning | Bright indirect light location | Direct sun exposure or deep shade |
My first attempt used a jar that was too small. The African violet I planted looked fine initially, but within three months the roots had filled the available soil completely. The plant stopped blooming and the lower leaves yellowed. Moving it to a jar twice the size solved the problem—the same plant produced flowers continuously for over a year after the transplant.
Light Requirements and Bloom Production
Flowering plants need significantly more light than foliage plants to produce blooms. The glass in apothecary jars filters some light, so positioning becomes critical.
Most flowering species need at least six hours of bright indirect light daily. “Bright indirect” means the area is well-lit but the sun doesn’t shine directly on the plant. A spot near an east window or a few feet back from a south window usually provides this.
Too little light causes flower buds to drop before opening or prevents bud formation entirely. The plant might look healthy and produce new leaves, but blooms won’t develop. Too much direct sun overheats the jar and can scorch flowers or leaves.
Rotating the jar weekly helps plants grow evenly. Without rotation, they’ll lean toward the light source and develop lopsided growth. A quarter turn once a week keeps the shape balanced.
Artificial light works if natural light is insufficient. LED grow lights positioned 12-18 inches above the jar for 10-12 hours daily can support blooming. This matters more in winter when natural daylight hours decrease.
Signs your jar isn’t getting enough light:
- Flower buds form but drop before opening
- Long gaps between blooming cycles
- Stems elongate and become spindly
- Leaf color fades or becomes pale
- New growth appears smaller than older growth
Signs of too much light:
- Leaves develop brown or white scorched patches
- Plants wilt even when soil is moist
- Excessive temperature inside jar (above 80°F)
- Flowers fade quickly or brown at edges
- Algae grows rapidly on soil surface or glass
I kept a begonia terrarium on a north-facing windowsill for four months. The plant stayed healthy but produced only two small flower clusters in that entire time. Moving it to an east window where morning sun reached it indirectly changed everything—it bloomed almost continuously after that adjustment.
Watering Schedule and Techniques
Closed systems need water much less frequently than regular potted plants. The moisture recycles inside the jar through condensation and evaporation. I water my closed terrariums roughly every three to four weeks.
Open systems lose moisture through the top opening and need watering more often—usually once a week, sometimes twice in very dry environments.
The best way to tell if watering is needed is by checking the condensation pattern and looking at the soil through the glass. If condensation has stopped appearing overnight and the pebble layer at the bottom looks dry, it’s time to add water. If the soil still looks dark and moist all the way to the bottom of the visible layer, wait.
Add water slowly using a small watering can with a narrow spout or a squeeze bottle. Direct the water toward the inside glass edge so it runs down into the soil rather than hitting the plant directly. This prevents water from sitting on leaves or flowers where it can cause rot or spotting.
For closed systems, add small amounts and check the result over a few days. You can always add more water, but removing excess moisture requires opening the jar for extended periods.
Room temperature water works better than cold water from the tap. Cold water shocks the roots slightly and increases condensation dramatically for a short period.
Here’s what I’ve learned about watering frequency:
| Jar Type | Typical Frequency | Factors That Increase Need | Factors That Decrease Need |
|---|---|---|---|
| Closed, small jar | Every 3-4 weeks | Bright light, warm room temperature | Cool room, low light |
| Closed, large jar | Every 4-6 weeks | Fast-growing plants, warm location | Slow-growing plants, stable temperature |
| Open, any size | Every 5-7 days | Dry climate, warm temperature, small jar | Humid climate, large soil volume |
| Partially open | Every 7-10 days | Large gap in lid, dry air | Small gap, moderate humidity |
The biggest watering mistake I made was adding too much at once to a closed jar. The excess water pooled in the pebble layer and the soil stayed saturated for weeks. The plant developed root rot and died. Now I add water in small amounts—maybe a quarter cup for a medium jar—and wait to see how the system responds before adding more.
Fertilizing Flowering Plants in Jars
Flowering plants need nutrients to produce blooms, but the closed or semi-closed environment of a terrarium means fertilizer doesn’t wash away like it does in regular pots. This makes overfertilizing easy and damaging.
Use a diluted liquid fertilizer formulated for flowering houseplants. Cut the recommended strength in half or even to one-quarter strength. Apply this weak solution once every two to three months for closed systems, once a month for open systems.
Too much fertilizer causes salt buildup in the soil, which shows up as white crusty deposits on the soil surface or around the glass edges at the soil line. These salts can burn roots and prevent blooming even though you’ve added nutrients.
Organic fertilizers tend to work better in terrarium environments because they release nutrients slowly. Fish emulsion diluted to quarter strength works well. The smell dissipates quickly in open systems but lingers in closed jars, so apply it and leave the lid off for a day if the odor bothers you.
Flowering plants in terrariums often need less fertilizer than the same species in regular pots because the recycled moisture keeps nutrients available in the soil instead of washing them away.
Signs you’re fertilizing correctly:
- Steady bloom production during the plant’s natural flowering season
- Healthy leaf color
- Moderate growth rate
- No salt crust on soil or glass
Signs of over-fertilization:
- White crusty buildup on soil surface
- Brown leaf tips or edges
- Reduced flowering despite adequate light
- Excessive leaf growth with few flowers
- Algae growing rapidly on glass or soil
I fertilized one jar every two weeks at full strength, thinking more food would mean more flowers. Instead, the plant stopped blooming entirely and a thick white crust appeared on the soil. I had to remove the plant, rinse the roots, and replace all the soil to fix the problem. Less fertilizer, applied less often, produces better results.
Integrating Jars into Vintage or Modern Decor
Apothecary jars have a traditional pharmaceutical aesthetic that fits naturally with vintage decor styles, but they also work in modern settings with the right approach.
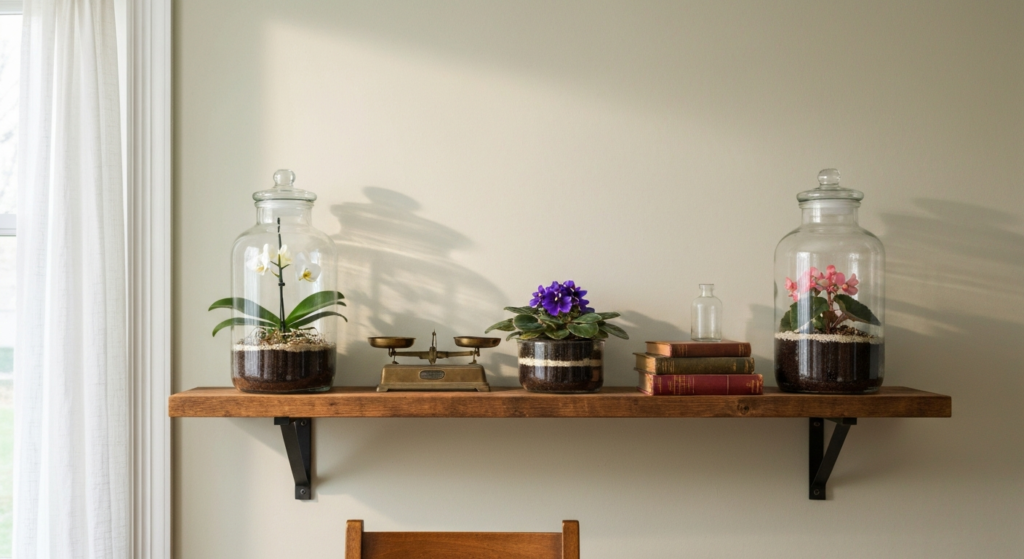
For vintage or farmhouse styles, group several jars of varying heights on wooden shelves or a rustic table. The glass shows the plants while the jar shapes create visual interest. Mix planted jars with empty ones holding dried flowers or decorative objects to build a collected-over-time look.
In modern or minimalist spaces, use a single large apothecary jar as a statement piece. Place it on a clean surface with plenty of negative space around it. The plants inside provide the color and organic element while the glass maintains the clean aesthetic.
Industrial style spaces work well with apothecary jars on metal shelving or concrete surfaces. The scientific look of the jars complements exposed brick and metal finishes.
Lighting matters for display. Position jars where they’ll receive natural light for the plants but also where the glass catches light interestingly. A backlit shelf or a spot where morning sun shines through the glass creates a glowing effect.
Avoid cluttering the display space around the jars. The beauty of an apothecary jar terrarium comes from seeing the layers and plants clearly through the glass. Too many surrounding objects compete for attention and reduce the impact.
The jars themselves can vary in shape. Traditional pharmaceutical jars with wide bodies and narrow necks work well, but straight-sided cylinder jars or wider bowl shapes also function. Match the jar shape to your decor style—traditional apothecary shapes for vintage looks, clean geometric shapes for modern settings.
Some pairing ideas:
- Vintage decor: Group with old books, brass objects, antique scales
- Modern decor: Single jar on marble or white surface with minimal surroundings
- Industrial decor: Metal shelving, exposed bulb lighting, concrete surfaces
- Bohemian decor: Mix with macrame, textured fabrics, multiple plant varieties
- Traditional decor: Wooden furniture, symmetrical arrangement, classic jar shapes
I placed three different-sized jars on a floating shelf in my kitchen. Each held a different flowering plant—African violet, episcia, and a small begonia. The varying heights created rhythm, and the morning light coming through the window made the glass glow. That simple arrangement got more comments from visitors than any other plant display I’ve created.
Troubleshooting Common Problems
Even with correct setup, problems sometimes develop. Recognizing them early prevents plant loss.
Mold on soil surface appears as white fuzzy growth. This happens most often in closed systems with poor air circulation. The fix is opening the lid for a few days to dry the surface layer and reduce humidity temporarily. You can also carefully scrape off the moldy soil surface and replace it with fresh soil.
Yellowing lower leaves usually means overwatering or insufficient light. Check the moisture level in the pebble reservoir—if water is sitting there constantly, you’re adding too much. Also verify the jar is getting enough bright indirect light.
Flower buds dropping before opening points to sudden temperature changes, inconsistent watering, or low humidity in open systems. Move the jar away from drafts or heat sources and maintain more consistent moisture levels.
Algae growth on glass or soil happens when light, moisture, and nutrients combine. It’s most common in overfertilized jars with high light. Reduce fertilizer frequency and wipe the glass clean. Consider moving the jar to slightly lower light if algae keeps returning.
Plants not flowering despite healthy growth usually means insufficient light. Increase light exposure gradually—don’t move from shade to direct sun suddenly. Also check that you’re using a fertilizer formulated for flowering rather than foliage growth.
Root rot shows as wilting even when soil is wet, yellowing leaves, or a sour smell. This means the soil is staying too wet. Open the jar to dry it out, reduce watering frequency, and check that your drainage layers are functioning properly.
Quick reference for common issues:
| Problem | Most Likely Cause | Solution |
|---|---|---|
| White mold on soil | Too much moisture, poor air flow | Open jar for 2-3 days, remove affected soil |
| Yellowing leaves | Overwatering or low light | Reduce water, increase light gradually |
| Buds drop before opening | Temperature fluctuations, inconsistent care | Stabilize location and watering schedule |
| Algae on glass | Excess nutrients and light | Reduce fertilizer, wipe glass, adjust light |
| No blooms | Insufficient light | Move to brighter location, add grow light |
| Root rot | Waterlogged soil | Improve drainage, reduce watering |
Long-Term Maintenance and Replanting
Flowering plants in apothecary jars eventually outgrow their space or decline in vigor. Knowing when and how to refresh the setup extends the life of your terrarium.
Most small flowering plants need replanting every 12-18 months. Signs it’s time include roots visible against the glass, reduced blooming despite good care, or the plant looking crowded with leaves pressing against the jar sides.
To replant, remove the entire plant carefully by tipping the jar and sliding everything out. Gently separate the plant from the old soil and layers. Trim any dead or damaged roots.
Clean the jar completely before rebuilding. Old soil particles and algae residue will cloud the glass if left behind. Wash with soap and rinse thoroughly.
Rebuild the layers with fresh materials. Old soil becomes compacted and loses drainage properties over time. New charcoal works better at controlling odors than reused charcoal.
You can replant the same species or try something different. If your setup worked well, repeating it makes sense. If you had persistent problems, this is the time to adjust your approach—maybe switching from closed to open system or choosing a different plant variety.
Division works for plants that have grown into multiple crowns, like African violets or episcias. Gently separate the plant into two or more sections, each with roots attached. This gives you plants for additional jars or to share.
Some flowering plants decline naturally after a year or two even with perfect care. Plan to replace them with fresh specimens when blooming stops or the plant looks tired. This isn’t a failure—it’s the normal life cycle.
Maintenance schedule that works:
- Weekly: Check moisture level, rotate jar, remove any dead flowers or leaves
- Monthly: Assess condensation patterns, fertilize if needed, wipe glass clean
- Every 3-6 months: Inspect plant health closely, prune if needed, adjust care routine
- Every 12-18 months: Consider replanting if plant has outgrown space or vigor declines
I kept one African violet terrarium running for nearly two years before the plant needed replacement. It bloomed consistently for the first 18 months, then flower production slowed even though nothing in my care had changed. Replanting with a fresh violet brought back continuous blooming within weeks.
FAQs
Can I use any glass jar as an apothecary-style terrarium?
Any clear glass jar with a wide enough opening to plant through works functionally, but the term “apothecary jar” specifically refers to jars with certain shape characteristics—usually a wide body and either a narrow neck or a fitted lid. Regular mason jars, cookie jars, or glass canisters function the same way for plant growing but won’t give you the same aesthetic. The key requirements are clear glass so you can see the layers and plants, and an opening large enough to get your hand through for planting and maintenance.
How do I prevent my flowering plant from getting too large for the jar?
Choose naturally small varieties from the start—miniature begonias, compact African violets, or dwarf streptocarpus. Prune regularly by pinching back new growth before it gets leggy. Avoid over-fertilizing, which encourages excessive leaf growth. If the plant does outgrow its jar, you’ll need to transplant it to a larger container or divide it into smaller sections. Some plants simply grow too large eventually, and replanting becomes necessary every 12-18 months.
What’s the white crusty buildup on my terrarium glass and soil?
That’s mineral salt accumulation from water and fertilizer. Tap water contains dissolved minerals that stay behind as water evaporates. Fertilizer adds more salts. In regular pots, these wash through with excess water drainage, but in terrariums they accumulate. Reduce fertilizer frequency and strength. Switch to distilled or rainwater for watering if your tap water is very hard. Wipe the glass with a damp cloth, and scrape the salt crust off the soil surface carefully. The buildup won’t hurt the glass but can damage plant roots if it gets too concentrated.
Do I need to use activated charcoal or can I skip that layer?
You can technically skip charcoal and the terrarium will still grow plants, but you’ll likely develop odor problems over time. Charcoal prevents the smell that occurs when organic matter breaks down in standing water. Without it, the water reservoir in the pebble layer eventually smells like a stagnant pond. The charcoal also provides some filtration that keeps the water cleaner. It’s inexpensive and lasts years, so including it solves problems before they start. I’ve tried both ways, and jars without charcoal developed odors within two to three months.
Conclusion
Apothecary jars transform humidity-loving flowering plants from high-maintenance frustrations into self-sustaining displays. The key is matching your system—open, closed, or partial—to the specific plant you’re growing, then building the right soil layers to support healthy roots while keeping the glass clear enough to see what you’ve created.
Start with one jar and a proven plant like an African violet or small begonia. Pay attention to condensation patterns in the first few weeks. Adjust the lid position until you find the balance where moisture recycles without creating constant fog. Water sparingly compared to regular pots. Give the jar bright indirect light and resist the urge to fertilize heavily.
The learning curve is real but short. Your first attempt might need adjustments, and that’s expected. The second jar usually works better because you’ll understand how moisture, air flow, and plant selection interact in glass containers.
Once you’ve got one thriving terrarium, the approach works for as many jars as you want to set up. Each one becomes a small ecosystem that handles its own humidity while you provide light, occasional water, and minimal feeding.
What flowering plant are you most interested in trying in an apothecary jar setup, and what style of decor would you pair it with? Drop your thoughts below—I’d like to hear which combinations people are planning to build.