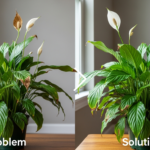
You bought amaryllis bulbs hoping they’d bloom for Christmas or a birthday party, but they opened three weeks late—or worse, too early. The flowers were gone before your event even started.
This happens because most gardening advice treats amaryllis timing like guesswork. You’re told “plant 8-10 weeks before” without accounting for bulb size, temperature differences, or variety quirks. One bulb might bloom in 6 weeks while another takes 12, even under identical conditions.
Here’s what you’ll learn: how to calculate exact bloom times based on your specific bulbs, how to stagger plantings so flowers appear when you actually need them, and what to do when stalks get floppy or blooms come early. You’ll also find out how pot size changes everything and why some bulbs need cold treatment while others don’t.
I’m Darcey Wren, and I’ve been working with indoor flowering plants for years, with a particular focus on bulbs and their bloom cycles. My interest started after a string of failed holiday amaryllis attempts—bulbs that either bloomed in October or sat dormant until February. Through trial, temperature logs, and plenty of mistakes, I learned that forcing bulbs isn’t about following a single timeline. It’s about understanding what each bulb needs based on where it came from and where you want it to go. What I share here comes from seasons of tracking bloom dates, comparing varieties, and figuring out what actually works versus what sounds good in theory.
Understanding Amaryllis Bloom Timing Basics
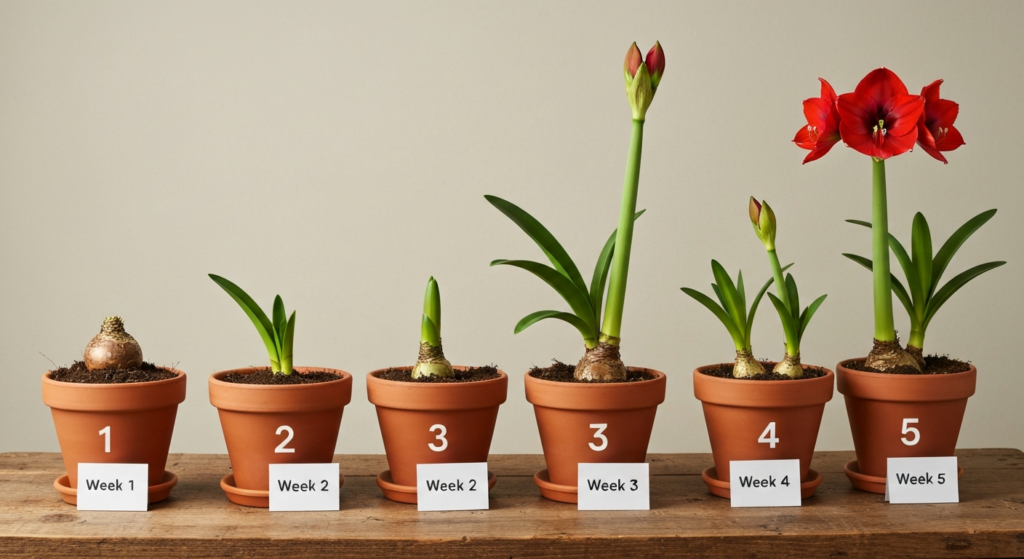
Amaryllis bulbs don’t operate on a fixed schedule. A bulb’s time from planting to bloom depends on several factors: its size, whether it’s been chilled, the variety, and your indoor temperature.
Most commercial bulbs sold in fall are preconditioned and ready to plant. These typically bloom 7-10 weeks after potting. But that range matters. A 7-week bulb blooming for Thanksgiving won’t work if you needed it for Christmas.
Larger bulbs (over 32 cm circumference) usually bloom faster than smaller ones. They have more stored energy and can push out flower stalks without building as much root mass first. A 34 cm bulb might bloom in 6 weeks while a 28 cm bulb from the same batch takes 9 weeks.
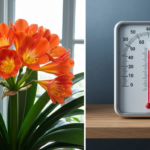
Temperature plays a bigger role than most guides mention. Amaryllis grow fastest between 68-75°F. Below 65°F, everything slows down. Above 78°F, stalks elongate too quickly and get weak. A bulb in a 70°F room will bloom about a week earlier than one kept at 62°F.
When Chilling Is Needed (And When It Isn’t)
Not all amaryllis bulbs need cold treatment. The ones sold at garden centers in October and November are usually already processed and ready to grow. They’ve either been chilled by the supplier or they’re freshly harvested South African bulbs that don’t require dormancy.
You need to chill bulbs in these situations:
- You’re forcing a bulb that bloomed last year and went through a growing season
- You bought “summer-harvested” bulbs that haven’t been preconditioned
- You want to delay bloom timing by putting bulbs on hold
- The variety specifically requires vernalization (less common in modern hybrids)
Chilling mimics winter dormancy. It signals the bulb that growing season is coming and triggers flower formation. Without this period, some bulbs will only produce leaves or bloom erratically.
The standard chilling period is 8-12 weeks at 40-50°F. A garage, basement cold room, or spare refrigerator works. Don’t store bulbs near apples or other ethylene-producing fruits—the gas can damage flower buds inside the bulb.
After chilling, the bulb needs 2-3 weeks at room temperature before you’ll see a flower spike. Add this to your calculations. If you chill for 10 weeks and then pot up, expect blooms around 8-10 weeks from potting, not from the start of chilling.
Calculating Your Exact Planting Date
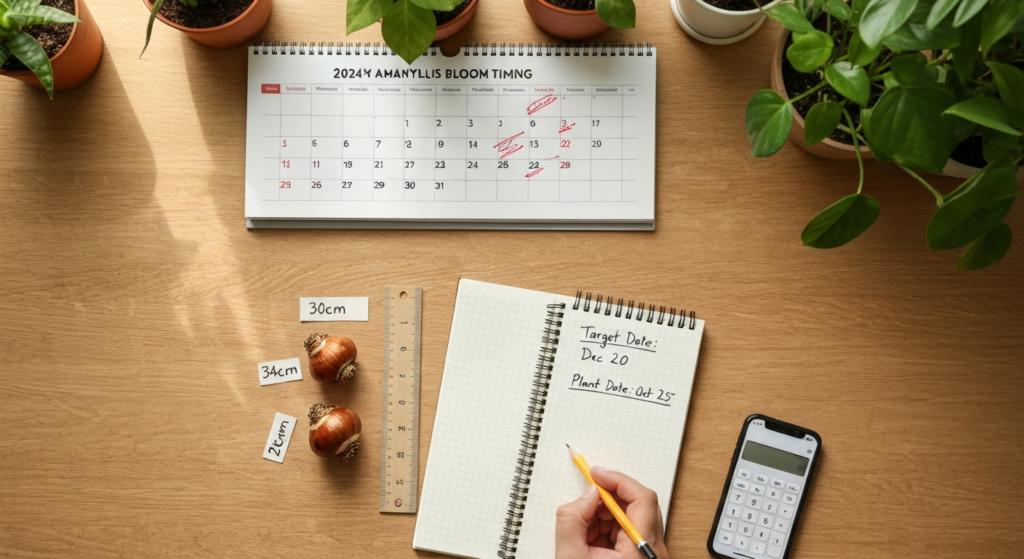
Working backward from your target date is the only reliable method. Here’s the process I use:
Start with your event date. Subtract 7-10 weeks (49-70 days) depending on your bulb size and room temperature. This gives you a planting window, not a single day.
For precision, use this approach:
For large bulbs (32+ cm) in warm rooms (70-75°F): Plant 6-7 weeks before your date
For medium bulbs (28-32 cm) in moderate temps (65-70°F): Plant 8-9 weeks before
For smaller bulbs (24-28 cm) or cooler rooms (60-65°F): Plant 10-12 weeks before
I track bloom times in a simple notebook. After each bulb flowers, I write down the planting date, bulb size, variety name, and actual bloom date. After a few seasons, patterns emerge. ‘Red Lion’ consistently blooms in 7 weeks for me. ‘Apple Blossom’ takes 9-10 weeks.
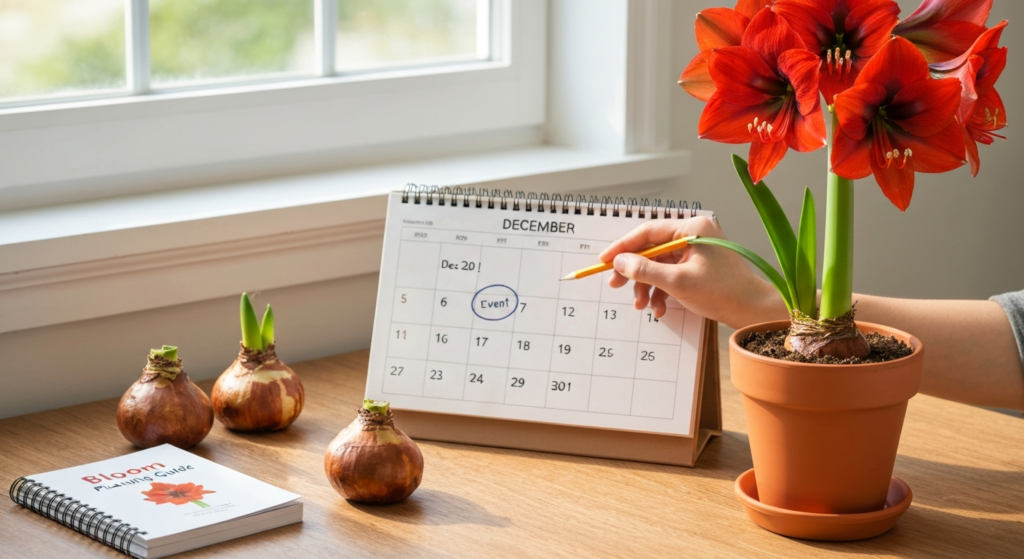
Here’s an example: You want blooms for December 20th. You have 30 cm bulbs and keep your house at 68°F. Plant around October 25th (8 weeks prior). But also plant a backup bulb on November 1st. If the first bulb runs early, the second provides coverage.
The Offset Planting Method for Continuous Blooms
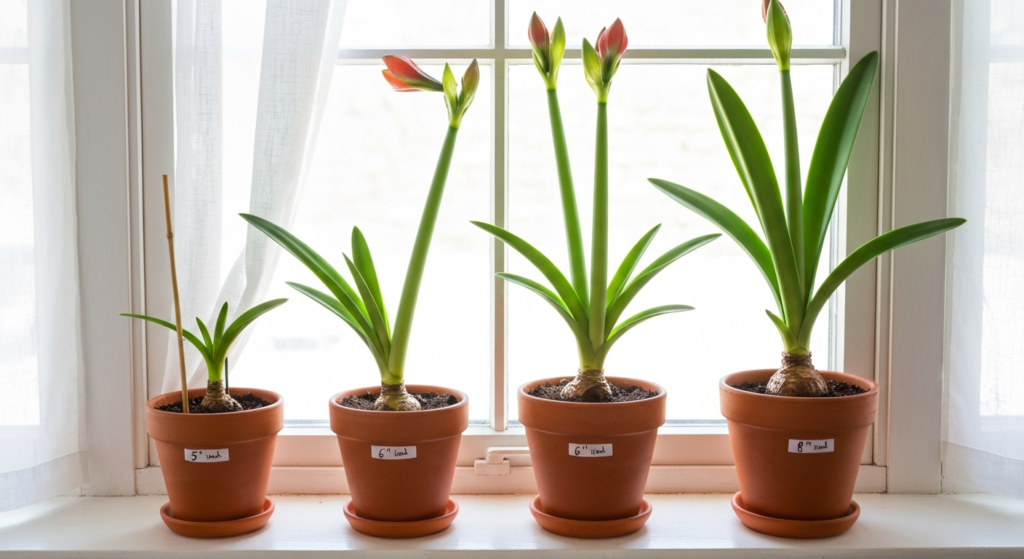
Single bulbs give you about 2 weeks of flowers, sometimes less. For extended blooming or to cover a range of dates, plant in succession.
Buy 3-5 bulbs and stagger planting by one week intervals. If you plant one bulb each week for four weeks, you’ll have flowers opening over a 6-8 week period rather than all at once.
This works especially well for:
- Holiday decorating from Thanksgiving through New Year’s
- Gift-giving where you want fresh blooms to give away weekly
- Events with uncertain dates (like a baby shower that might move)
- Learning which timing works best in your specific conditions
I learned this method after planting six bulbs on the same day for a December wedding. They all bloomed during the first week of December—beautiful, but useless for the December 28th event. Now I plant the first bulb 10 weeks out, the second at 9 weeks, the third at 8 weeks, and so on.
Keep notes on which planting date produced blooms closest to your target. Next year, you’ll know exactly when to start.
How Pot Size Affects Stalk Strength and Bloom Timing
Pot diameter changes more than aesthetics. It impacts root development, moisture levels, and how quickly the bulb pushes up flower stalks.
Tight pots (1-2 inches of space around the bulb):
- Faster blooming (by about 5-7 days)
- Less root mass
- Higher risk of floppy stalks
- Need more frequent watering
Roomier pots (3-4 inches of space):
- Slower initial growth
- Stronger root system
- Sturdier flower stalks
- Better for rebloom attempts
Most bulbs come in tight plastic pots for shipping. These work fine if you plan to discard the bulb after flowering. But if you want sturdy stalks or plan to save the bulb, repot into something larger.
I use 6-7 inch pots for bulbs I’m keeping long-term and 5-6 inch pots for one-time holiday forcings. The smaller pots bloom about a week earlier, which helps with tight deadlines.
Depth matters less than width. Plant bulbs with the top third exposed. Burying them deeper doesn’t improve stability—it just delays sprouting.
| Pot Size | Bulb Spacing | Bloom Speed | Stalk Stability | Best Use |
|---|---|---|---|---|
| 4-5 inches | 1 inch around | Fastest (6-7 weeks) | Moderate | Single-use forcing, tight deadlines |
| 6-7 inches | 2-3 inches around | Moderate (7-9 weeks) | Good | Rebloom plans, sturdier stalks |
| 8+ inches | 3+ inches around | Slower (8-10 weeks) | Excellent | Multiple bulbs per pot, long-term growing |
Stopping and Starting: Holding Bulbs for Later Dates
Sometimes you need to pause the process. Maybe you bought bulbs on sale in September but don’t need blooms until February. Or a bulb sprouted too early and you want to slow it down.
For unpotted bulbs, store them in a cool, dark place at 50-60°F. A basement, unheated closet, or garage works. Check monthly for mold or soft spots. Bulbs can stay dormant this way for 2-3 months.
Once a bulb has sprouted, you can’t truly stop it, but you can slow it significantly. Move the pot to a cooler location (55-60°F) and reduce watering. Growth will nearly halt. When you’re ready to resume, bring it back to warmth and normal watering. Expect about a week of adjustment before growth speeds up again.
I’ve used this technique when bulbs sprouted in early November for a late December target. Moving them to an unheated bedroom for three weeks delayed blooming by about 10 days—just enough to hit the date I needed.
Don’t try to refrigerate a sprouted bulb. The flower stalk will abort or produce malformed blooms.
Variety Differences: Not All Amaryllis Bloom at the Same Pace
Some amaryllis varieties are consistently faster or slower than the standard 8-week estimate.
Faster varieties (6-7 weeks):
- ‘Red Lion’
- ‘Minerva’
- Most single-flowered reds
Standard timing (7-9 weeks):
- ‘Apple Blossom’
- ‘Picotee’
- ‘Papilio’ (butterfly amaryllis)
Slower varieties (9-11 weeks):
- Large doubles like ‘Double Dream’
- ‘Charisma’
- Some white varieties
Double-flowered varieties almost always take longer. They’re producing more petal mass per bloom, which requires extra energy and time.
If you’re buying bulbs specifically for event timing, check the variety. Retailers sometimes list expected bloom times on the packaging. When that information isn’t available, assume 8 weeks and plant a backup bulb one week later.
Troubleshooting Floppy Flower Stalks
Weak, leaning stalks are the most common amaryllis complaint. The flowers get so heavy that the stalk bends or even breaks.
This happens for several reasons:
Insufficient light: Amaryllis need bright, indirect light or direct morning sun. In dim conditions, stalks stretch and weaken. Move the pot to the brightest window you have.
Too much heat: Temperatures above 75°F cause rapid, weak growth. The stalk elongates before it thickens enough to support the blooms. If your house runs hot, place the pot in a cooler room during the day.
Uneven watering: Alternating between bone-dry and soggy weakens cell structure. Keep soil lightly moist—not wet, not desert-dry.
Pot too small: Inadequate root mass means less support. A bulb crammed in a tiny pot can’t anchor a heavy flower stalk properly.
Natural variety trait: Some varieties just produce taller, thinner stalks. ‘Papilio’ and certain white doubles are prone to this.
The fix depends on timing. If the stalk is already growing, you can’t thicken it. Instead, support it. Use a thin bamboo stake and soft ties (never wire or string that cuts into the stem). Position the stake on the side opposite the blooms so it’s less visible.
For future bulbs, prevent the problem by using adequate pot size, rotating the pot daily so the stalk grows straight instead of leaning toward light, and keeping temperatures moderate.
| Problem | Likely Cause | Solution |
|---|---|---|
| Stalk leans toward window | Insufficient rotation | Turn pot 180° every 2-3 days |
| Thin, weak stalk | Too warm or too dark | Move to bright, cool location (65-70°F) |
| Stalk breaks under bloom weight | Variety trait or pot too small | Stake early, before buds open |
| Stalk grows but stays short | Bulb too cold or insufficient water | Increase warmth to 70°F, check soil moisture |
What to Do When Blooms Arrive Too Early
If flowers open 2+ weeks before your target date, you have a few options:
Cut the flower stalk and use it as a cut flower. Amaryllis blooms last 7-10 days in a vase, sometimes longer. This won’t help with a live plant display, but it’s better than watching the flowers fade before your event.
Lower the temperature to extend bloom life. Moving the pot to a 60-65°F location can add 3-5 days to the flowering period. Avoid cold drafts or temperatures below 55°F, which can damage the blooms.
Plant backup bulbs at staggered intervals. This is why I always recommend multiple bulbs for critical dates. If one blooms early, another should be coming along behind it.
What to Do When Blooms Arrive Too Late
Late blooms are harder to fix than early ones. You can’t speed up a bulb that’s already in process by much.
If the stalk is visible but buds haven’t colored up yet, try these:
Move the pot to a warmer spot (75-78°F). This accelerates the final stages slightly—maybe gaining you 2-3 days.
Increase light exposure. More photosynthesis means marginally faster bud development.
Make sure the bulb isn’t waterlogged. Soggy soil slows everything down.
Realistically, if a bulb is running a week or more late and your event is imminent, it won’t make it. This is why planting date calculations and backup bulbs matter so much.
Storing Bulbs After Blooming for Future Use
Not everyone saves amaryllis bulbs, but if you want to rebloom them, proper storage is necessary.
After flowers fade, cut off the flower stalk but leave all foliage. The leaves produce energy that refills the bulb for next year’s blooms. Keep watering and provide bright light.
When leaves yellow naturally (usually late summer or early fall), stop watering. Let the soil dry completely. The leaves will brown and wither.
Once fully dormant, you have two storage options:
Option 1 – Leave in the pot: Store the entire pot in a cool, dark place (50-60°F) for 8-12 weeks. Don’t water. After the rest period, bring it out, resume watering, and watch for new growth.
Option 2 – Remove from soil: Dig up the bulb, brush off soil, and store it loose in a mesh bag or cardboard box in a cool location. This works well if you need to save space or if you’re storing multiple bulbs.
Check stored bulbs monthly for mold, soft spots, or shriveling. A slightly wrinkled bulb is normal, but one that feels squishy or shows fuzzy growth should be discarded.
When you’re ready to force again, pot up chilled bulbs and follow the same timing calculations as before. Rebloomed bulbs often perform similarly to their first cycle, though blooms might be slightly smaller if the bulb didn’t rebuild fully.
Temperature and Light Requirements During Forcing
Amaryllis aren’t fussy, but they respond noticeably to environmental conditions.
Temperature zones:
- 40-50°F: Chilling/storage temperature
- 55-60°F: Slowed growth, useful for holding back early sprouts
- 65-70°F: Ideal growing temperature, steady development
- 70-75°F: Faster growth, good for making up lost time
- 75°F+: Too warm, causes weak, floppy stalks
Keep temperatures as consistent as possible. A room that swings from 60°F at night to 78°F during the day will produce unpredictable results.
For light, amaryllis need bright indirect light or a few hours of direct morning sun. South or west-facing windows work best. North-facing windows might not provide enough intensity, leading to stretched stalks.
Rotate the pot every 2-3 days so the stalk grows straight. Amaryllis stalks bend toward the light source, and without rotation, you’ll end up with a leaning tower situation.
Managing Multiple Bulbs in One Display
Planting several bulbs together creates a fuller display, but timing becomes trickier.
If you pot 3-4 bulbs in one container, they won’t all bloom at the same moment even if they’re the same size and variety. There’s natural variation. Expect blooms to stagger over 1-2 weeks.
This can actually work in your favor. Instead of one big burst of flowers that fades quickly, you get a rolling display.
For truly synchronized blooms, pot bulbs individually and then group the pots together once flower stalks emerge. This way you can replace pots as flowers fade and maintain a consistent look.
I’ve used this method for a February wedding where I needed six blooming bulbs on display at once. I started with ten bulbs planted at various intervals, watched which ones timed out correctly, and swapped in fresh ones as needed.
Common Mistakes That Throw Off Timing
After years of forcing amaryllis, I’ve seen the same errors repeatedly. Avoiding these saves a lot of frustration:
Planting too shallow or too deep: The bulb’s shoulder (widest part) should sit at soil level. Too deep delays sprouting. Too shallow means poor stability.
Overwatering before sprouting: Wet soil without active growth leads to rot. Water lightly at planting, then hold off until you see a green shoot.
Ignoring variety information: Assuming all amaryllis behave identically leads to timing failures. Check the variety or at least note bulb size.
Using old, soft bulbs: A bulb that feels spongy or shows dark spots won’t bloom reliably, if at all. Firm, heavy bulbs are your best bet.
Not accounting for your specific conditions: A timeline that works in someone else’s 72°F house might fail in your 64°F apartment. Measure your actual temperatures.
Skipping backup bulbs: One bulb for a critical date is gambling. Two or three bulbs staggered by a week gives you much better odds.
Watering Schedule Throughout the Forcing Process
Amaryllis watering needs change as the bulb develops.
At planting: Water lightly to settle soil around roots. Soil should be barely moist, not soaked.
Before sprouting (first 1-3 weeks): Water sparingly, only when soil feels dry 2 inches down. Overwatering at this stage causes rot.
After shoot emerges: Increase watering to keep soil lightly moist. Water when the top inch of soil dries out.
During active growth and flowering: Water regularly, maintaining consistent moisture. Don’t let the pot dry out completely, but don’t leave it sitting in water either.
After blooming (if saving the bulb): Continue regular watering to support leaf growth. Taper off gradually as leaves begin to yellow.
I use the finger test rather than a strict schedule. Stick your finger into the soil up to the second knuckle. If it feels dry, water. If it feels damp, wait.
Fertilizing: When It Helps and When It Doesn’t
For a single-season forcing where you’ll discard the bulb after blooming, fertilizer isn’t necessary. The bulb contains everything needed to produce flowers.
If you plan to save and rebloom the bulb, fertilizer matters. After flowering, feed every 2-3 weeks with a balanced liquid fertilizer (10-10-10 or similar) diluted to half strength. This helps the bulb rebuild energy reserves.
Don’t fertilize during the dormant storage period or in the first few weeks after planting. The bulb doesn’t need it, and excess salts can damage roots.
Dealing with Pests and Diseases During Forcing
Amaryllis are relatively pest-free, but problems do occur.
Red blotch (fungal disease): Shows as red streaking on leaves, stalks, or bulb scales. It doesn’t prevent blooming but weakens the bulb long-term. Avoid overhead watering and improve air circulation. Badly infected bulbs should be discarded.
Bulb rot: Soft, mushy areas on the bulb, often with a foul smell. Caused by overwatering or damaged tissue. Once rot starts, it’s hard to stop. Cut away affected areas if caught early and let the bulb dry out, but success rates are low.
Fungus gnats: Small flies that hover around the soil surface. They’re annoying but don’t harm the bulb. Reduce watering frequency and let the soil dry out more between waterings. Yellow sticky traps catch adults.
Mealybugs or aphids: Rare indoors but possible. Wipe them off with rubbing alcohol on a cotton swab or spray with insecticidal soap.
Preventing problems is easier than treating them. Use clean pots, fresh potting mix, and don’t reuse soil from previous bulbs.
Using Forcing for Gift-Giving
Amaryllis bulbs make excellent gifts because you can time them to arrive in bloom for birthdays, anniversaries, or holidays.
For gifting, plant the bulb 7-8 weeks before the event. Ship or deliver it once the flower stalk is visible but buds haven’t opened yet. This gives the recipient the pleasure of watching the blooms unfold while ensuring the flowers actually appear on time.
If you’re giving an unplanted bulb, include instructions with specific planting dates based on your calculations. Most people don’t know about variety timing differences or temperature impacts.
Decorative pots add appeal but make sure they have drainage holes. A beautiful pot without drainage will kill the bulb through waterlogging.
Frequently Asked Questions
Can I force the same amaryllis bulb every year?
Yes, but each cycle requires a full growing season to rebuild the bulb’s energy. After flowering, let the leaves grow for at least 4-6 months, feeding regularly. Then give the bulb an 8-12 week dormant period before forcing again. Bulbs can bloom for many years if properly maintained, though blooms may become smaller over time if the bulb doesn’t get adequate leaf-growing time.
What should I do if my amaryllis produces leaves but no flowers?
This usually means the bulb didn’t get a proper dormant period or wasn’t large enough to support flowering. Small bulbs (under 24 cm) often need another year of growth before they’ll bloom. If you’re reblooming a bulb, make sure it went through 8-12 weeks of cool, dry storage before planting. Also check that you’re not overfeeding with nitrogen-heavy fertilizer, which promotes leaves at the expense of flowers.
Why did my amaryllis flower stalk grow crooked or split in two directions?
The stalk grows toward the strongest light source. If you don’t rotate the pot regularly, it will bend and stay bent. Some bulbs naturally produce two flower stalks, which is actually desirable—it means more blooms. If stalks are growing in opposite directions, it’s usually because the pot wasn’t rotated. Start rotating as soon as the shoot appears, and the problem won’t develop.
Is it normal for amaryllis bulbs to feel soft on the sides after blooming?
Slight softness is normal after the bulb expends energy on flowers. The outer scales may feel less firm. As long as there’s no mushiness, bad smell, or dark wet spots, the bulb is fine. With proper aftercare (feeding, adequate light, water), it will firm up again as it rebuilds. However, if large sections feel like mush or you see liquid oozing out, that’s rot, and the bulb should be discarded.
Final Thoughts
Timing amaryllis blooms for specific dates isn’t guesswork once you understand the factors involved. Bulb size, temperature, variety, and whether the bulb has been chilled all impact when flowers appear. Working backward from your target date and planting multiple bulbs at staggered intervals gives you the best chance of having blooms exactly when you need them.
The key is keeping records. Write down what you plant, when you plant it, and when it actually blooms. After a few seasons, you’ll have a personal reference guide that’s more accurate than any generic timeline.
Start with one or two bulbs this season. Note what happens. Adjust your approach next time based on what you learned. That’s how you move from hoping bulbs bloom on time to knowing they will.
What’s your target date for amaryllis blooms this year, and what’s been your biggest challenge with timing them?