You bought a beautiful vintage teacup at a yard sale. Now it sits on your shelf, unused. Meanwhile, those miniature roses you picked up at the grocery store are struggling in their plastic pot, and you’re not sure how to keep them alive.
Here’s the problem: Most people don’t realize that miniature roses can thrive in unconventional containers like teacups, mugs, or vintage tins. They either overwater them, choose the wrong variety, or watch helplessly as powdery mildew takes over. The roses die within weeks, and those charming containers stay empty.
But what if you could combine both? What if that teacup could become a living piece of art, with healthy roses blooming month after month?
This guide shows you exactly how to plant, grow, and maintain miniature roses in teacups and other non-traditional containers. You’ll learn which varieties stay truly small, how to handle drainage issues, how to fight powdery mildew before it starts, and how to keep your roses blooming in spaces barely bigger than your fist.
Why Miniature Roses Work in Small Containers
Miniature roses aren’t just regular roses that happen to be small. They’re genetically distinct varieties bred to stay compact, with some producing flowers smaller than a dime. Their root systems are proportionally smaller too, which means they can genuinely thrive in containers that would stress out larger roses.
The key difference is growth habit. A standard rose develops deep taproots and spreading lateral roots. Miniature varieties have fibrous root systems that spread outward rather than down, making them suitable for shallow containers. I’ve successfully grown miniature roses in containers as shallow as 3 inches, though 4-5 inches gives better results.
Here’s what makes them different:
Root depth: Miniature roses typically root 4-6 inches deep, while standard roses need 12-18 inches.
Water needs: Smaller root systems mean faster drying, but also less water required per watering.
Nutrient requirements: They need the same nutrients as full-sized roses, just in smaller quantities more frequently.
Choosing the Right Miniature Rose Varieties
Not all miniature roses are created equal for container growing. Some marketed as “miniature” still reach 12-15 inches and overwhelm small containers. You need micro-miniatures and true miniatures that max out at 6-10 inches.
Best Varieties for Teacup Growing

| Variety Name | Mature Height | Flower Size | Growth Pattern | Notes |
|---|---|---|---|---|
| Si | 4-6 inches | 0.5 inches | Very compact | Smallest variety available |
| Cinderella | 6-8 inches | 0.75 inches | Bushy | Handles indoor conditions well |
| Baby Betsy McCall | 6-8 inches | 1 inch | Upright | Continuous bloomer |
| Popcorn | 8-10 inches | 1 inch | Dense | Disease resistant |
| Gourmet Popcorn | 8-10 inches | 1.25 inches | Spreading | Good for wider containers |
I’ve had the best luck with Si and Cinderella in actual teacups. They stay compact enough that the container doesn’t look overwhelmed, and their smaller flowers keep everything in proportion.
What to Avoid
Skip these when shopping:
Patio roses: These grow 18-24 inches and will quickly outgrow decorative containers.
Miniflora: Bred for outdoor gardens, they typically reach 12-18 inches.
Polyantha roses: Often labeled as miniatures but grow much larger.
The label should specifically say “micro-miniature” or list a mature height under 10 inches. If you’re buying from a grocery store, ask to see the tag before purchasing.
Selecting Containers Without Drainage Holes
This is where most people hesitate. Traditional gardening wisdom says you need drainage holes. But drilling through vintage china or antique tins risks destroying them. The solution isn’t complicated, but it requires a different approach to watering and soil composition.
Container Requirements
Your container needs these minimum dimensions:
Depth: At least 3 inches, preferably 4-5 inches Width: At least 3 inches across the top Volume: Roughly 12-16 ounces (a standard teacup size)
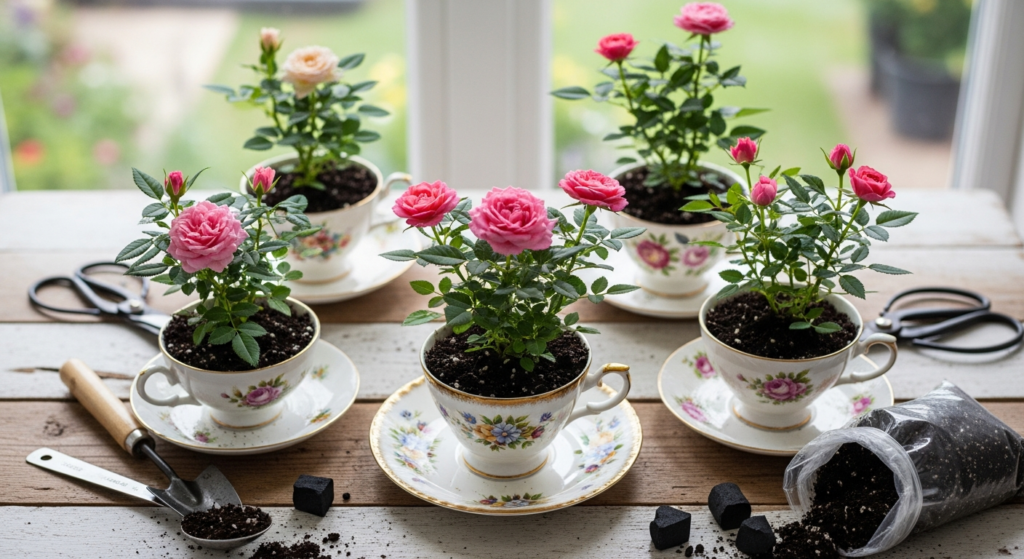
I’ve used everything from actual teacups to gravy boats, small pitchers, vintage mugs, enamel camping cups, and antique sugar bowls. The shape matters less than the size.
Material Considerations
| Container Material | Pros | Cons | Special Notes |
|---|---|---|---|
| Ceramic/Porcelain | Attractive, stable, holds moisture | No drainage, can crack | Use glazed interior for longer life |
| Metal (tin, enamel) | Durable, unique aesthetic | Can rust, heats up quickly | Line with plastic to prevent rust |
| Glass | Shows root development, decorative | No insulation, algae growth | Keep out of direct sun to prevent root cooking |
| Wood | Natural look, breathable | Rots over time, leaks | Line with plastic, replace every 2-3 years |
Creating Drainage Layers in Non-Draining Containers
Since you can’t drill holes, you build a drainage zone at the bottom. This isn’t just tossing in pebbles and hoping for the best. There’s a specific method that actually works.
The Three-Layer System

Layer 1 – Drainage medium (1 inch): Use horticultural charcoal mixed with perlite in a 1:1 ratio. The charcoal absorbs excess moisture and prevents bacterial growth. Pebbles alone don’t work because water still pools around them.
Layer 2 – Barrier (thin): A piece of landscape fabric, coffee filter, or paper towel prevents soil from washing into the drainage layer. I cut circles slightly larger than the container width.
Layer 3 – Growing medium (remaining space): Your actual potting soil goes here, filling to about 1 inch below the rim.
The charcoal makes a real difference. I tested this side by side with pebbles alone, and the charcoal-containing pots stayed healthier with less root rot. Charcoal is also available at most garden centers in the orchid supply section.
How This System Works
When you water, excess liquid drains through the soil and barrier into the charcoal-perlite layer. The charcoal absorbs some moisture and releases it slowly, while the perlite creates air pockets. As the plant uses water, moisture wicks back up from the drainage layer through capillary action.
This creates a reservoir effect without drowning the roots. The key is never letting the drainage layer stay completely saturated.
The Right Soil Mix for Container Roses
Regular potting soil is too dense for roses in containers without drainage. You need something that drains quickly but still holds some moisture.
My Working Formula
Here’s what I use after testing dozens of combinations:
- 40% quality potting soil (not garden soil)
- 30% perlite or pumice
- 20% coco coir
- 10% worm castings
Mix these thoroughly before planting. The perlite creates air spaces, the coco coir holds moisture without staying soggy, and the worm castings provide slow-release nutrients.
Why These Ingredients Matter
Perlite: Those white chunks aren’t just filler. They prevent compaction and create paths for excess water to drain away from roots.
Coco coir: Holds 8-10 times its weight in water but releases it readily to roots. Unlike peat moss, it doesn’t become hydrophobic when it dries out.
Worm castings: Provide gentle, continuous feeding without burning tender roots. They also improve soil structure.
Some people add sand for drainage, but I’ve found it makes the mix too heavy and can actually reduce drainage when it settles.
Transplanting Grocery Store Miniature Roses
Those roses at the grocery store or hardware store are typically grown in greenhouses with perfect conditions, then shocked into retail environments. Many are also multiple plants crammed into one pot. Here’s how to give them a fighting chance.
Initial Assessment
Before you even buy, check these things:
Leaf color: Should be deep green, not yellow or pale No black spots: Sign of fungal issues Firm stems: Squeeze gently; they shouldn’t feel mushy Bud count: Look for multiple buds, not just open flowers
If the plant looks stressed in the store, it’ll be harder to save at home.
The Transition Process
Don’t transplant immediately. Grocery store roses need gradual adjustment.
Days 1-3: Keep in original pot. Place in bright, indirect light. Water when the top inch feels dry.
Days 4-7: Separate plants if multiple are in one pot. Gently remove from container and carefully tease apart root balls. Most grocery store roses are 3-4 plants bunched together.
Day 7: Transplant into your chosen container using the layered system described earlier.
I learned this the hard way when I transplanted a grocery store rose immediately and it dropped every leaf within a week. The gradual approach gives the plant time to adjust to your home’s conditions before dealing with transplant stress.
Separating Multiple Plants
Here’s the process I use:
Remove the entire root ball from the plastic pot. You’ll often see it’s actually several plants. Run lukewarm water over the roots to loosen soil. Gently pull apart individual plants, trying to keep as many roots intact as possible. If roots are completely tangled, use clean scissors to cut between plants.
Each separated plant can go into its own small container. This actually works better for teacup arrangements since you get a more proportional look.
Watering Without Drainage: The Most Critical Skill
This is where people fail. Watering a container without drainage holes requires precision. Too much and you drown the roots. Too little and the plant dries out.
The Weight Method
The most reliable way to know when to water is by weight. Lift your container right after watering and remember how heavy it feels. Check it every day by lifting. When it feels significantly lighter, it’s time to water.
I keep a small notebook where I track watering for the first month. Most of my teacup roses need water every 3-4 days in summer, every 5-7 days in winter.
How Much Water to Add
This is critical: you want to moisten the soil without filling the drainage layer.
For a standard 12-ounce teacup with the layered system I described:
Summer watering: 2-3 ounces of water (about 1/4 cup) Winter watering: 1-2 ounces of water
Pour slowly and watch. Stop when you see any moisture starting to collect at the very bottom if you can see it, or when the soil feels uniformly moist throughout.
If you accidentally overwater, tip the container at a 45-degree angle for a few minutes to let excess drain to one side, then use a turkey baster or syringe to remove it.
Signs You’re Watering Wrong
| Problem | Symptom | Cause | Fix |
|---|---|---|---|
| Overwatering | Yellow leaves, mushy stems, soil smells sour | Too much water too often | Reduce watering frequency and amount |
| Underwatering | Crispy brown edges, flower buds drop, wilting | Not enough water | Increase amount per watering |
| Root rot | Black roots visible at drainage layer, plant collapse | Saturated drainage layer | Tip out excess, reduce watering severely |
Fighting Powdery Mildew in Small Spaces
Powdery mildew is the white, fuzzy coating that appears on rose leaves. It’s especially common on indoor roses in containers because air circulation is limited. I’ve dealt with it on almost every miniature rose I’ve grown, but I’ve learned to manage it.
Why It Appears
Powdery mildew is a fungus that thrives in these conditions:
- Low air circulation
- Moderate temperatures (60-80°F)
- High humidity on leaf surfaces
- Crowded plant spacing
Your teacup rose probably has all four factors working against it.
Prevention Strategies
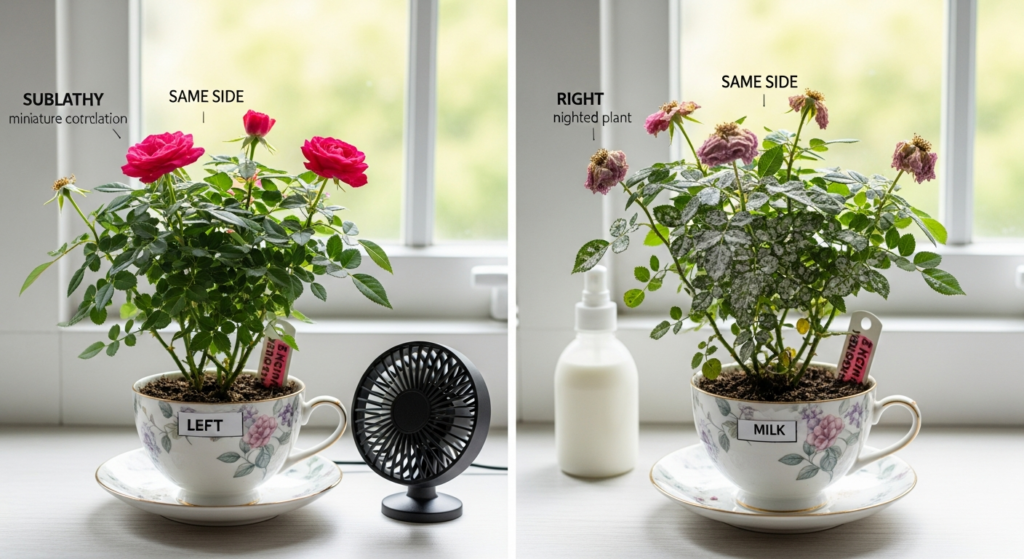
Air circulation: Point a small fan toward your roses for a few hours daily. It doesn’t need to be strong enough to move the leaves dramatically, just enough to keep air moving.
Spacing: Keep multiple containers at least 6 inches apart. I learned this when I grouped five teacup roses on a windowsill and all five developed mildew within a week.
Leaf wetness: Water the soil only, never the leaves. If you do get water on leaves, wipe them dry with a soft cloth.
Light: More light suppresses mildew. Roses need at least 6 hours of bright light daily.
Treatment Options
If mildew appears, act quickly. It spreads fast in small spaces.
Immediate action: Remove affected leaves immediately. Put them in a sealed plastic bag before disposing to avoid spreading spores.
Milk spray: Mix 1 part milk to 2 parts water. Spray on leaves weekly. The proteins in milk alter the pH of the leaf surface and prevent mildew growth. I’ve used this successfully for three years.
Baking soda solution: Mix 1 teaspoon baking soda with 1 quart water and a few drops of dish soap. Spray on all leaf surfaces. Use weekly until mildew is gone.
Neem oil: Mix according to package directions and spray every 7-10 days. This works but smells strong indoors.
I prefer the milk spray because it’s safe, cheap, and doesn’t smell. The downside is you need to reapply after any misting or humidity events.
What Doesn’t Work
I’ve tried these with poor results:
Increasing humidity: Makes the problem worse Removing all leaves: Stresses the plant too much in a small container Ignoring it: Spreads to other plants
Deadheading in Tight Spaces
Deadheading means removing spent flowers to encourage new blooms. In a tiny container, this serves double duty: it keeps the plant blooming and prevents the limited energy from going into seed production.
When to Deadhead
Remove flowers as soon as petals start to fade or drop. Don’t wait until the flower is completely dead. The plant is already directing energy toward that spent bloom.
The Right Cut
Find the spent flower and follow the stem down until you see a leaf with five leaflets. This is important—roses have leaves with three leaflets and leaves with five leaflets. You want to cut just above a five-leaflet leaf.
Make your cut at a 45-degree angle about 1/4 inch above where the leaf meets the stem. The angle helps water run off and prevents rot.
In a teacup-sized container, you might only have 2-3 five-leaflet leaves per stem. That’s fine. Cut above the first or second one you find.
What Happens Next
Within 5-7 days, you’ll see a new shoot developing from just below your cut. This shoot will produce the next flower. In good conditions, miniature roses can bloom continuously using this cycle.
Fertilizing Miniature Roses in Small Containers
Small containers mean limited nutrients. The soil volume is tiny, so nutrients wash through quickly even without drainage holes. Your rose needs regular feeding but in small amounts.
Fertilizer Type
Use a liquid fertilizer formulated for roses or general flowering plants. Look for these N-P-K ratios:
During blooming season: 10-15-10 or 5-10-5 During winter rest: 5-10-10 or stop fertilizing entirely
The middle number (phosphorus) promotes flowers. That’s what you want to emphasize.
Feeding Schedule
Here’s what works for me:
Spring through fall (growing season): Feed every two weeks at half the recommended strength.
Winter: Feed monthly at quarter strength, or stop completely if the plant isn’t producing new growth.
I dilute fertilizer more than the package says because the small soil volume means less buffering capacity. Full-strength fertilizer can burn roots in a teacup.
Application Method
Mix your diluted fertilizer and use it as your watering. Pour slowly over the soil surface until the soil is moist. Don’t drench the drainage layer.
Watch for these signs of fertilizer problems:
| Issue | Symptom | Solution |
|---|---|---|
| Too much fertilizer | White crust on soil surface, brown leaf tips | Flush with plain water; skip next feeding |
| Too little fertilizer | Pale leaves, weak stems, few blooms | Increase feeding frequency slightly |
| Wrong ratio | Lots of leaves, no flowers | Switch to higher phosphorus formula |
Light Requirements for Indoor Container Roses
Roses are sun lovers. They evolved to grow in fields and gardens with full sun exposure. Keeping them happy indoors in small containers means giving them as much light as possible.
Minimum Requirements
Your miniature rose needs at least 6 hours of bright light daily. Ideally, this is direct sun. South-facing windows work best in the Northern Hemisphere. East or west-facing windows can work but may need supplementation.
I’ve grown roses successfully on a south-facing windowsill where they received 4-5 hours of direct morning sun and bright indirect light the rest of the day. They bloomed continuously from March through October.
Signs of Insufficient Light
Leggy growth: Stems stretch toward the light source and become thin and weak.
Leaf drop: Lower leaves yellow and fall off.
No blooms: Buds form but don’t open, or no buds form at all.
Pale leaves: New growth comes in light green instead of deep green.
If you see these signs, your rose needs more light.
Supplemental Lighting
When natural light isn’t enough, use grow lights. I’ve used these successfully:
LED grow lights: Most energy-efficient. Look for full-spectrum bulbs with both blue and red wavelengths. Place 6-12 inches above the plant and run for 12-14 hours daily.
Fluorescent lights: Cheaper but less efficient. Use cool white and warm white tubes together. Place 4-6 inches above the plant.
Rotate your container a quarter turn every few days so all sides receive equal light. This keeps growth balanced.
Creative Display Ideas
Part of the charm of growing roses in unconventional containers is the display. Here are arrangements I’ve used and seen work well.
Tiered Displays
Use a cake stand or tiered serving tray. Place teacup roses on each level. This creates vertical interest and allows you to group multiple small containers without crowding them. Air circulates better, and each plant gets adequate light.
I’ve seen this done beautifully with all matching teacups for a formal look, or with mismatched vintage cups for a cottage garden feel.
Kitchen Windowsill Garden
Line up small containers along a kitchen windowsill. Mix teacup roses with other small plants like herbs or succulents. The variety adds visual interest while the roses provide color.
This works well if you’re already in the kitchen daily because you’ll remember to check water needs.
Repurposed Items as Containers
Beyond teacups, these items work well for miniature roses:
Vintage tins: Old tea tins, biscuit boxes, or tobacco tins in shallow sizes make excellent containers. The metal adds an industrial-vintage contrast to delicate roses.
Gravy boats and creamers: These have the right depth and interesting shapes. I’ve used a silver-plated creamer that developed a beautiful patina over time.
Small colanders or strainers: These actually have built-in drainage if you line them with landscape fabric. They work surprisingly well.
Antique sugar bowls: Often the perfect size with a lid you can remove.
Enamelware: Old camping cups, small pots, or measuring cups in enamel have a rustic charm and hold up well to moisture.
Grouping Strategies
| Display Style | Container Count | Spacing | Effect |
|---|---|---|---|
| Solo statement | 1 | N/A | Formal, focused |
| Trio cluster | 3 | 4-6 inches apart | Balanced, classic |
| Linear row | 5-7 | 3-4 inches apart | Modern, architectural |
| Scattered collection | 4-6 | Varied spacing | Casual, collected-over-time feel |
Seasonal Care Adjustments
Miniature roses grown indoors still respond to seasonal changes in light and temperature. Adjusting your care with the seasons keeps them healthy.
Spring and Summer
This is the active growing season. Your roses will push out new growth and bloom heavily.
Watering: More frequent, possibly every 2-3 days in hot weather.
Fertilizing: Every two weeks at half strength.
Deadheading: Remove spent blooms every few days.
Grooming: Pinch back leggy growth to encourage bushiness.
Fall
Growth slows as days shorten. Blooming continues but less vigorously.
Watering: Reduce frequency slightly as the plant uses less water.
Fertilizing: Continue every two weeks but consider dropping to quarter strength.
Light: Move to the brightest window you have as sun intensity decreases.
Winter
Many miniature roses will rest somewhat in winter, though indoor plants often continue some growth.
Watering: Reduce to once weekly or less. Check soil moisture before watering.
Fertilizing: Cut back to monthly or stop entirely if no new growth appears.
Temperature: Keep above 50°F but below 75°F if possible. Lower temperatures encourage dormancy and stronger spring growth.
Humidity: Indoor heating dries air significantly. Mist occasionally or use a pebble tray (a shallow dish of pebbles and water placed under the container).
I’ve found that roses that get a slight winter rest bloom more enthusiastically the following spring.
Troubleshooting Common Problems
Yellow Leaves
Possible causes:
- Overwatering (most common in containers without drainage)
- Nitrogen deficiency
- Natural aging of lower leaves
Solutions: Check soil moisture. If soggy, reduce watering. If dry and crusty, water hasn’t been reaching roots. If only bottom leaves are yellow and rest of plant looks healthy, it’s probably normal aging.
Leaf Drop
Sudden leaf drop usually means stress.
Common triggers:
- Temperature shock (moved from warm to cold area)
- Drafts from AC or heating vents
- Transplant shock
- Severe water stress
Solutions: Move away from temperature extremes. Maintain consistent care. Most roses recover if the stress is removed.
Buds Form But Don’t Open
This frustrating problem usually relates to light or water.
Causes:
- Insufficient light
- Inconsistent watering
- Low humidity
- Thrips (tiny insects that damage buds)
Solutions: Increase light exposure. Keep watering consistent. Check buds carefully for tiny insects. If present, spray with insecticidal soap.
No New Growth
If your rose looks healthy but isn’t growing:
Likely causes:
- Rootbound (roots have filled the entire container)
- Depleted nutrients
- Inadequate light
Solutions: Consider moving to a slightly larger container if roots are circling. Resume fertilizing if you’ve stopped. Increase light exposure.
When to Repot
Even though miniature roses stay small, they eventually outgrow tiny containers. Watch for these signs:
Roots growing into drainage layer: If you can see roots when you look at the bottom, it’s time.
Water runs straight through: Soil can’t absorb water because it’s mostly roots.
Stunted growth: Plant has stopped growing despite adequate light and food.
Top-heavy: Plant tips over easily because root mass has lifted it up.
I typically repot teacup roses once yearly, moving them to containers that are 1-2 inches larger in diameter. This gives roots room to expand without overwhelming the visual proportions.
The best time to repot is early spring just as new growth begins.
Realistic Expectations
Let me be direct about what to expect. Miniature roses in teacups are beautiful but not permanent fixtures. They’re more challenging than regular potted plants.
Average lifespan in a teacup: 1-2 years with good care before needing to move to a larger container.
Bloom frequency: With proper care, expect blooms in cycles. A flush of flowers, a rest period of 3-4 weeks, then another flush. This isn’t continuous blooming year-round.
Disease susceptibility: Higher than roses in optimal conditions because small containers create stress.
Time investment: Plan to check these plants every 2-3 days minimum. They can’t be ignored for a week.
These limitations don’t mean the project isn’t worthwhile. It just means understanding what you’re committing to. I keep teacup roses knowing they’ll eventually need larger homes, and I’m fine with that transition.
FAQ
Can I grow regular roses in teacups instead of miniature varieties?
No. Regular roses develop root systems far too large for teacup containers. Even young regular roses will quickly become rootbound and stressed. The plant will survive briefly but won’t thrive or bloom. Stick with true miniature or micro-miniature varieties that stay under 10 inches tall.
How do I know if I should separate a grocery store rose or keep it as one plant?
Gently remove the plant from its pot and look at the base. If you see multiple distinct stems emerging from different spots in the soil, you have multiple plants. If all stems emerge from a single base, it’s one plant. Multiple plants in one teacup will compete for resources and none will thrive, so separation improves overall success.
What should I do if water collects in the drainage layer and won’t absorb?
Tip the container at a 45-degree angle and use a turkey baster or syringe to extract the excess water from the bottom layer. This situation means you overwatered. Reduce the amount of water you add per watering session and extend the time between waterings. Let the plant dry out more than usual before the next watering.
Do miniature roses need a dormancy period, and how do I provide it indoors?
Miniature roses benefit from winter rest but don’t require a complete dormancy like outdoor roses. Reduce watering and fertilizing in winter months, and if possible, move them to a cooler room (55-65°F) with good light. This rest period isn’t mandatory for survival, but plants that experience it typically bloom more vigorously the following spring.
Conclusion
Growing miniature roses in teacups combines practicality with creativity. You’re taking varieties bred to stay small and giving them homes in containers that showcase their scale. The drainage layer system solves the no-holes problem. Regular deadheading keeps blooms coming. Vigilance with watering prevents the most common failures.
Start with one teacup and one proven variety like Cinderella or Si. Master the watering rhythm for that single plant before expanding your collection. Watch how it responds to your home’s specific conditions. Adjust as needed.
These tiny rose gardens won’t thrive through neglect, but they don’t need perfection either. They need consistent attention, good light, and proper watering. Get those right, and you’ll have blooming roses in containers that make people stop and look twice.
What unusual container are you considering for your miniature rose? Share your ideas in the comments below—I’d love to hear what creative containers you’re planning to try.