Most people think orchids are fragile, expensive plants that only survive in fancy greenhouses. I believed that too—until I brought home my first grocery store Phalaenopsis and watched it bloom for five straight months in my small apartment.
The truth is, you don’t need a lot of space, special equipment, or a green thumb to keep these plants alive. You just need to understand what they actually want, which is simpler than most care guides make it sound.
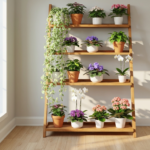
If you’re living in an apartment with limited windowsill space and worried about killing another plant, this guide will show you exactly how to care for compact orchids without overthinking it. No complicated schedules, no specialty tools—just practical steps that work in real living spaces.
I’m Darcey Wren, and I’ve been growing and writing about indoor flowering houseplants for years. What started as curiosity about keeping a single orchid alive turned into a fascination with understanding how these plants behave in typical home environments. I’m not a botanist or certified horticulturist—just someone who’s learned through trial, error, and careful observation what actually makes orchids thrive in apartments. My focus has always been on translating plant care into practical advice that works for real people in real spaces.
Why Phalaenopsis Orchids Work in Apartments
Phalaenopsis orchids, commonly called moth orchids, fit apartment life better than most flowering plants. They don’t need bright, direct sunlight. They don’t require daily watering. And unlike many houseplants, they actually prefer the moderate temperatures most people keep in their homes.
The compact varieties stay small—typically 8 to 12 inches tall—making them perfect for windowsills, bathroom counters, or small side tables. When they bloom, you get flowers that last two to four months, which is far longer than cut flowers or most other houseplants.
I started with standard-sized Phalaenopsis, but once I discovered the mini and compact varieties, everything changed. These smaller plants need less space, dry out more predictably, and are easier to move around when you’re figuring out the right spot.
Finding the Right Spot: Windowsill Placement That Actually Works
Light is the most important factor for orchid health, but it’s also the most misunderstood. Phalaenopsis don’t want direct sunlight hitting their leaves. In nature, they grow under tree canopies where light is filtered. Your apartment needs to mimic that.
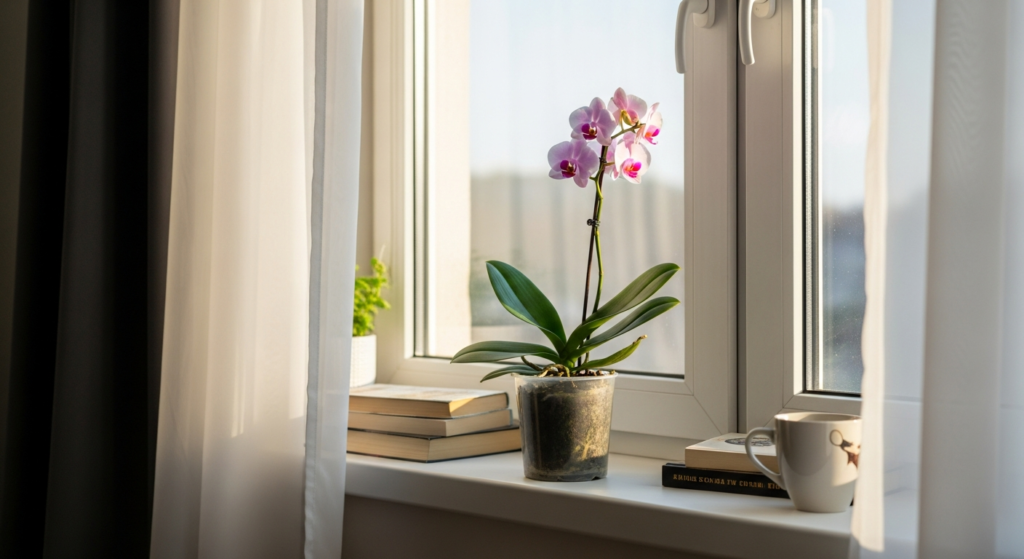
East-Facing Windows
This is my top recommendation. East windows give gentle morning light that won’t burn leaves. The sun hits for a few hours, then the plant gets bright indirect light the rest of the day. I’ve had the most consistent blooming with this exposure.
If your orchid’s leaves are a healthy medium green, you’re getting it right. Dark green leaves mean not enough light. Reddish or yellowish leaves mean too much.
North-Facing Windows
These work fine, especially if the window is large or unobstructed. The light is softer and more consistent throughout the day. Your orchid may bloom a bit less frequently, but it will still bloom. I keep several mini Phalaenopsis on a north-facing bathroom windowsill, and they rebloom reliably.
South and West Windows
These get hot, intense afternoon sun. You can use them, but you need to filter the light. A sheer curtain works well. Or place the orchid 3 to 4 feet back from the window where it gets brightness without direct rays.
I made the mistake of putting an orchid directly on a south-facing windowsill in summer. Within two weeks, the leaves developed sunburn—pale yellow patches that never recovered. The plant survived but didn’t bloom for over a year.
| Window Direction | Light Quality | Best For | What to Watch |
|---|---|---|---|
| East | Gentle morning sun | Most reliable blooming | Ideal for beginners |
| North | Consistent, softer light | Steady growth, less frequent blooms | May need supplemental light in winter |
| South | Intense, hot afternoon sun | Advanced growers only | Requires filtering or distance |
| West | Strong afternoon light | Can work with curtains | Monitor for leaf burn |
Distance and Positioning
Don’t assume the windowsill is the only option. I’ve found that placing orchids on a small table 2 to 3 feet from a bright window often works better than putting them directly on the sill. This gives them steady brightness without temperature swings from the glass.
Avoid spots near heating vents or air conditioning units. Orchids tolerate normal home temperatures, but they don’t like sudden blasts of hot or cold air.
The Ice Cube Watering Myth: Why It’s Wrong
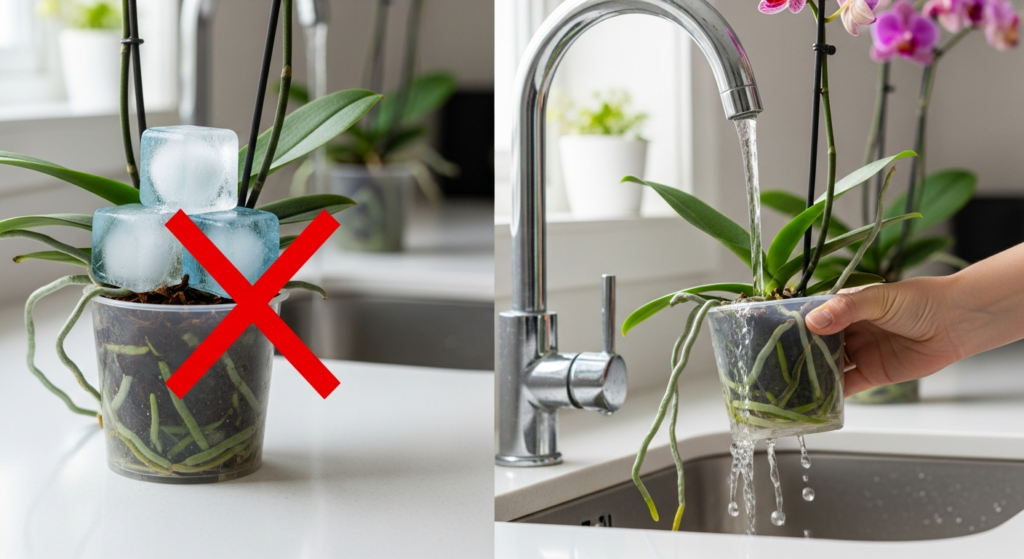
You’ve probably heard this advice: just put three ice cubes on your orchid’s bark once a week. It sounds simple, but it’s not how orchids actually absorb water.
Here’s the problem. Ice cubes melt slowly and unevenly. The cold water can shock the roots, especially in winter. And three ice cubes don’t provide enough water for most plants.
Phalaenopsis roots need to get thoroughly wet, then dry out before the next watering. That’s how they evolved—attached to tree bark in tropical forests where rain soaks them completely, then they dry out in humid air.
How to Water Properly
I water my orchids at the sink. I run room-temperature water through the bark medium for about 30 seconds, making sure it drains completely through the holes in the pot. Then I let the pot sit in the sink for a few minutes to finish draining.
The goal is to soak the roots and bark, not leave the plant sitting in water. Orchids don’t have soil that holds moisture—they have bark that should dry out between waterings.
How often should you water? This depends on your apartment’s humidity, temperature, and the size of the pot. For me, it’s usually every 7 to 10 days in winter and every 5 to 7 days in summer.
The best way to know is to check the roots through the clear plastic pot most orchids come in. Green or mottled roots mean they’re hydrated. Silver or white roots mean they’re dry and ready for water.
If you can’t see the roots, stick your finger into the bark about an inch down. If it feels damp, wait. If it’s dry, water.
What About Humidity?
Phalaenopsis prefer 40% to 60% humidity, which is slightly higher than most apartments maintain in winter. But they’re adaptable. Mine do fine in 30% to 35% humidity during heating season.
If your apartment air is very dry and you notice the leaves wrinkling or the buds dropping, you can set the pot on a tray filled with pebbles and a small amount of water. The pot sits on the pebbles, not in the water. As the water evaporates, it raises humidity around the plant.
I don’t mist my orchids. Misting leaves water droplets sitting in the crown of the plant, which can lead to rot.
Choosing the Right Bark Medium
When you buy an orchid, it usually comes potted in bark chips or a bark-based mix. This isn’t soil—it’s chunks of tree bark that allow air to reach the roots.
Over time, bark breaks down. It compacts, holds too much water, and starts to suffocate the roots. This is when people think their orchid is dying, but really it just needs fresh bark.
When to Repot
Repot every 1 to 2 years, or when you notice the bark looking soggy, compacted, or breaking down into small pieces. I also repot if the roots are growing over the edge of the pot or if the plant seems unstable.
The best time to repot is after the orchid finishes blooming and before it starts growing new leaves or roots.
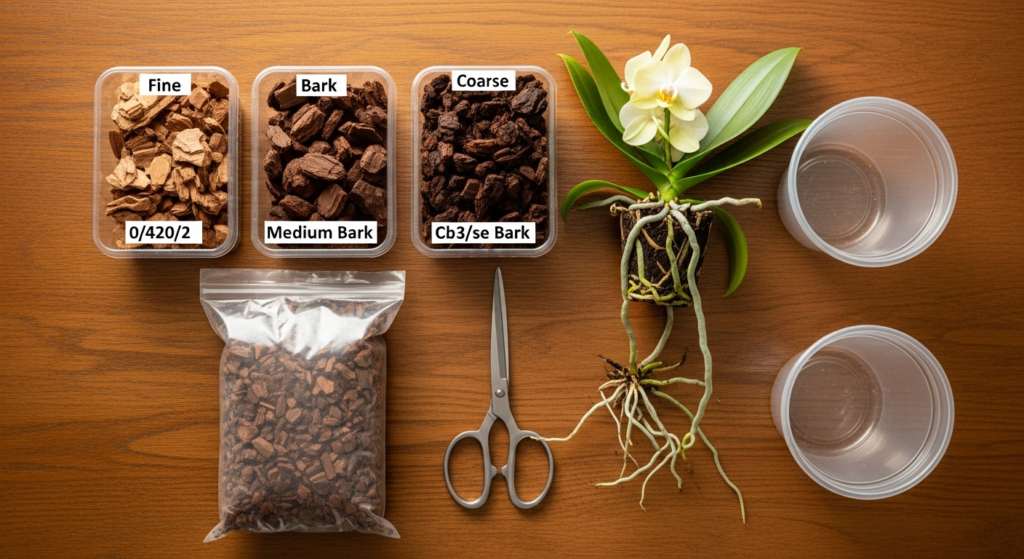
Bark Types and Sizes
Orchid bark comes in different sizes: fine, medium, and coarse.
For small and mini Phalaenopsis, use fine to medium bark. The smaller bark pieces fit better in small pots and hold a bit more moisture, which helps smaller plants that dry out faster.
Standard-sized Phalaenopsis do well in medium bark. Coarse bark drains very quickly and works better for larger orchids or very humid environments.
I use a commercial orchid bark mix that includes some perlite and charcoal. The perlite improves drainage, and the charcoal helps prevent rot. You can find these mixes at most garden centers or online.
| Bark Size | Best For | Watering Frequency | Drainage Speed |
|---|---|---|---|
| Fine (¼ inch) | Mini orchids, small pots | Every 5-7 days | Moderate |
| Medium (½ inch) | Standard Phalaenopsis, apartment growers | Every 7-10 days | Good |
| Coarse (¾ inch+) | Large orchids, humid climates | Every 10-14 days | Very fast |
How to Repot
Remove the orchid from its old pot. Gently shake off the old bark and trim any dead or mushy roots with clean scissors. Healthy roots are firm and green or white. Dead roots are brown, hollow, or squishy.
Place the plant in a pot that’s about the same size as the root mass—not much bigger. Fill around the roots with fresh bark, tapping the pot gently to settle the medium. Don’t pack it down hard. The bark should be loose enough for air to flow.
Water thoroughly after repotting, then wait about a week before watering again. This gives any damaged roots time to heal.
Encouraging a Second Bloom Spike
The most common question I get is: “My orchid finished blooming. Will it bloom again?”
Yes, if you care for it correctly. Phalaenopsis can rebloom from the same spike or send up a new one. Getting them to do this in an apartment takes patience and the right conditions.
After the Flowers Fall
When the last flower drops, look at the spike. If it’s still green and firm, you can encourage a secondary bloom. Cut the spike just above the second or third node from the bottom. A node is the small bump on the spike where a flower stem branched off.
Use clean, sharp scissors or pruning shears. Make the cut about ¼ inch above the node.
Within a few weeks to a couple months, the plant may send out a new branch from one of those nodes. This secondary bloom won’t be as large as the first, but you’ll get flowers faster.
If the spike turns brown or starts drying out, cut it all the way down to the base. This tells the plant to focus on root and leaf growth instead of maintaining a dying spike.
Temperature Drop Trick
Here’s what actually triggers blooming in Phalaenopsis: a slight temperature drop at night. In nature, this happens in fall when nights get cooler. In apartments, you can mimic this.
For about four weeks, expose the orchid to night temperatures around 55°F to 60°F, with daytime temperatures in the mid-70s. This 10- to 15-degree difference signals the plant to bloom.
I do this by moving orchids closer to a window in fall or early winter, or placing them in a slightly cooler room at night. Just make sure they’re not right against cold glass.
After a month of this temperature cycle, move the plant back to normal conditions. Within 6 to 12 weeks, you should see a new spike emerging from the base of the plant.
Fertilizer Helps
During active growth (spring and summer), I fertilize every other watering with a balanced orchid fertilizer diluted to half strength. The formula I use is 20-20-20.
In fall and winter, I reduce feeding to once a month. Orchids grow more slowly in shorter days, so they don’t need as many nutrients.
Never fertilize dry roots—always water first, then apply diluted fertilizer.
Compact Varieties Perfect for Small Spaces
Not all Phalaenopsis are the same size. If you’re working with limited space, look for these smaller varieties.
Mini Phalaenopsis
These stay under 10 inches tall with flowers around 1 to 2 inches across. They’re perfect for bathroom windowsills or small shelves. I find them easier to manage because they dry out faster and more predictably.
Common mini varieties include Phalaenopsis Sogo and Phalaenopsis Muskateer. You’ll often see them labeled as “table top” or “miniature” orchids at stores.
Compact Standard Phalaenopsis
Some standard varieties naturally stay smaller—around 12 to 15 inches tall. They have larger flowers than minis but take up less space than full-sized plants. Look for varieties like Phalaenopsis Mituo King or Phalaenopsis Chia E Yenlin.
Multiflora Types
Multiflora orchids produce more flower spikes with smaller blooms. Instead of one or two large spikes, you get several shorter spikes with dozens of small flowers. These look full and lush without being tall or wide.
| Variety Type | Height | Flower Size | Best Placement | Blooming Pattern |
|---|---|---|---|---|
| Mini | 6-10 inches | 1-2 inches | Small shelves, bathrooms | Multiple shorter spikes |
| Compact Standard | 10-15 inches | 3-4 inches | Windowsills, desks | 1-2 tall spikes |
| Multiflora | 8-12 inches | 1.5-2.5 inches | Anywhere with indirect light | 3-5 shorter spikes |
When buying from a store, check the label or ask staff about the plant’s mature size. Many grocery store orchids are standard varieties that can get quite large.
Common Problems and How to Fix Them
Even with good care, issues come up. Here’s what I’ve dealt with and how I solved it.
Leaves Turning Yellow
One or two lower leaves turning yellow and falling off is normal as the plant ages. If multiple leaves yellow quickly, you’re either overwatering or the bark has broken down.
Check the roots. If they’re brown and mushy, you’ve overwatered or the medium is staying too wet. Repot into fresh bark and cut back on watering frequency.
Buds Dropping Before Opening
This is called bud blast. It happens when the plant experiences sudden stress—usually from temperature changes, drafts, or moving the plant after buds form.
Once buds appear, keep the orchid in the same spot with consistent conditions. Don’t move it to a different window or room. Avoid placing it near doors or vents.
No New Blooms
If your orchid won’t rebloom, it’s usually a light or temperature issue. Make sure it’s getting enough bright, indirect light. Check that the leaves are medium green, not dark green.
Try the temperature drop trick I mentioned earlier. And be patient—Phalaenopsis can take 6 months or more between bloom cycles.
Wrinkled Leaves
This indicates dehydration. Either you’re not watering enough, or the roots are damaged and can’t absorb water.
Check the roots. If they look healthy, increase watering frequency slightly. If the roots are dead or damaged, repot into fresh bark and trim away dead material.
Frequently Asked Questions
Can I grow orchids in a bathroom with no windows?
Phalaenopsis need natural light to bloom. A windowless bathroom won’t provide enough light unless you add a grow light. If your bathroom has a window with decent brightness, it’s actually a great spot because of the higher humidity from showers.
Should I remove the plastic pot and plant directly in a decorative container?
Keep the clear plastic pot. It lets you monitor root health and moisture levels. Place the plastic pot inside a decorative cache pot for display. This also protects your furniture from water damage during watering.
How do I know if my orchid is getting too much or too little light?
Leaf color tells you everything. Medium green leaves mean good light. Dark green leaves mean not enough light—the plant is producing more chlorophyll to capture what’s available. Red, yellow, or pale leaves mean too much light. Adjust placement based on what you see.
My orchid’s roots are growing outside the pot. Is this bad?
No, this is normal. Phalaenopsis are epiphytes—they naturally grow attached to trees with roots exposed to air. Aerial roots are healthy and help the plant absorb moisture from the air. You can tuck them back into the pot during repotting, or just leave them alone.
Final Thoughts
Growing orchids in an apartment doesn’t require perfection. It requires understanding what the plant actually needs—filtered light, periodic watering, occasional feeding, and a temperature shift to encourage blooming.
Start with one compact Phalaenopsis. Put it near an east or north window. Water when the roots turn silver. Wait for it to bloom. Then try encouraging a second spike using the methods I’ve outlined.
The learning curve isn’t steep. Once you see how the plant responds to your care, you’ll know exactly what adjustments to make. Within a year, you’ll probably be adding more orchids to your collection.
What’s holding you back from trying an orchid? Drop a question in the comments and I’ll help you figure out the right approach for your space.